
Education has evolved a ton in the last decade. There have been loads of digital learning innovations and lots of new tools added to classrooms of all kinds.
One of those is video.
Teachers have been using video (and Vidyard) for years to engage and educate their students. (In some cases, they’ve even come up with creative ways for students to use video for projects.)
Now, as many school districts find themselves abruptly shifting to virtual classrooms and struggling to maintain continuity of learning, video has become a necessity for many educators.
Whether you’re already a pro at virtual teaching or you’re adapting to remote learning without any prior experience, you can add video to your virtual lesson plans quickly and easily.
Find out why you should try using videos in your virtual classroom, how you can use video for remote learning, tips for actually creating educational videos, and how an video platform for education can make it all easier.
Contents1.Why is Using Videos in the Classroom a Good Idea?1.1 Everyone Loves Video1.2 Video for Education is Growing in Popularity1.3 Video Teaching Meets the Majority of Learners’ Needs1.4 Video is Highly Engaging1.5 Video Improves Learning Retention1.6 Video is More Flexible and Accessible for Students1.7 Video Helps You Support Parents1.8 Video is Reusable1.9 Anyone Can Do It2.How Can I Use Recorded Video in My Virtual Classroom?2.1 Record Video Lessons2.2 Record Assignment Instructions2.3 Answer Questions Clearly Using Video2.4 Turn Classwide Announcements into Videos2.5 Provide Students with Useful Feedback2.6 Share Asynchronous Video Updates with Parents2.7 Make Live Video Calls Available On-Demand2.8 Create ‘Virtual Field Trips’ Using Video2.9 Use Video as Part of a ‘Flipped Classroom’2.10 Give Students Video-Based Assignments3.How Do I Make Educational Videos?3.1 Choose the Right Place to Record3.2 Keep It Short3.3 Make Content Easy to Digest with Playlists3.4 Be Authentic and Show Enthusiasm3.5 Think About Video as a Distinct Format3.6 Ask Questions and Add Activities3.7 Ask Students What They Think4.Why Should I Use a Video Platform for Education?
Why is Using Videos in the Classroom a Good Idea?
Video is the trifecta: Engaging, entertaining, and educational. It’s a medium that lets you capture and keep student attention and one that helps improve their learning retention.
Plus, recorded, asynchronous video gives you more control over your content than a live video call does, giving you the ability to deliver clear, concise information in a nice presentation.
But those aren’t the only benefits of adding video to your virtual classroom.
1. Everyone Loves Video
Video is everywhere: Cisco predicts it’ll make up 82% of all internet traffic by 2021.
It’s a massively popular format across age groups, including kids and teens.
Today’s youth love video. They’ve grown up on it and it’s a medium they’re very comfortable with (perhaps even the medium they’re most comfortable with).
In fact, 71% of teen smartphone users spend at least three hours a day watching video on their phones—that’s more time than they spend on messaging apps, social networking, or playing games on their smartphones.
2. Video for Education is Growing in Popularity
Not only is video everywhere, it’s also a popular format choice for learning.
In fact, 23% of online videos are viewed in order to learn something. Not only that, education videos on YouTube are viewed twice as often as videos in the Pets & Animals category.
But it’s not just in general. The principle holds true for students as well.
Social video platform YouTube is the preferred learning tool for 59% of Gen Z students, who often use it to study. (In comparison, 60% of Millennials prefer printed books when learning.) There’s even a growing category of “study with me videos,” where people film themselves studying to encourage good study habits.
A whopping 80% of Gen Z teens say that YouTube has helped them become more knowledgeable about something and 68% say YouTube has helped them improve or gain skills that will help them prepare for the future.
Nearly half (49%) of education professionals estimate that typical students watch between six and 20 education videos every month.
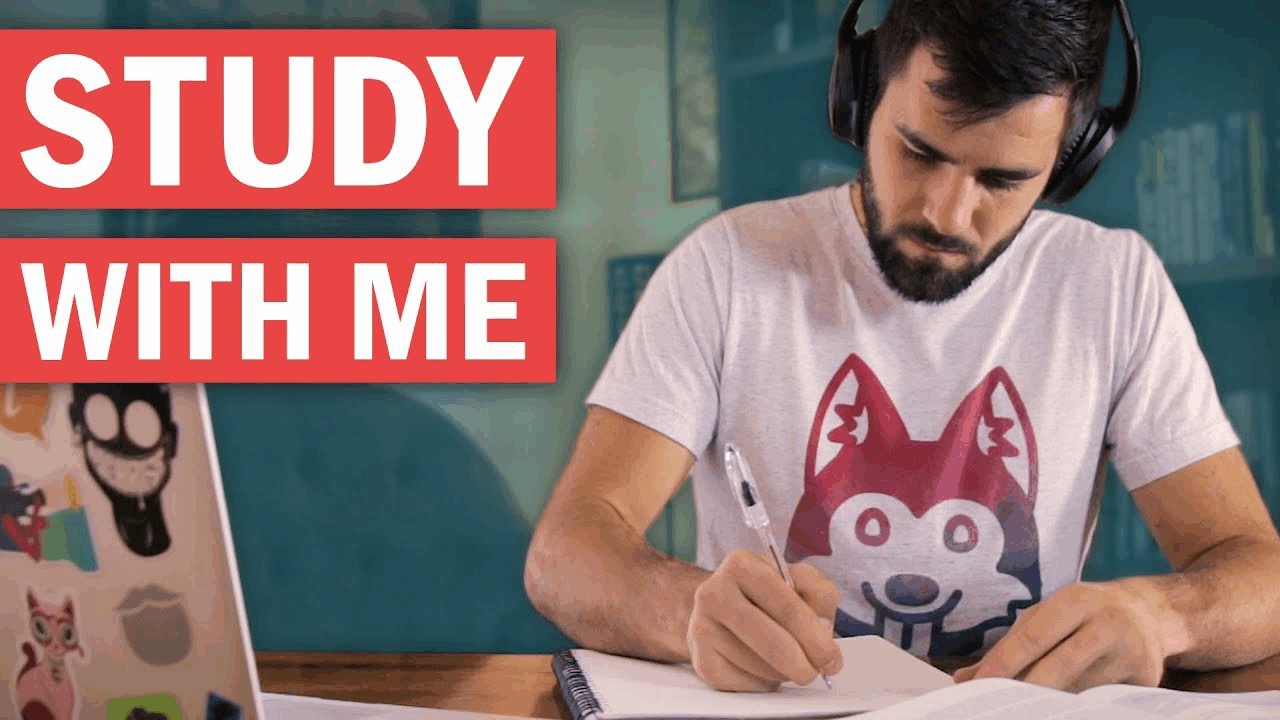
Study with Me Videos
Study with me videos give viewers a virtual study buddy, which proponents say helps them focus. The genre originally began gaining momentum in 2019, with some of the most popular videos wracking up millions of views.
Study with me videos range in length from concentrated 30-minute study sessions to eight plus hours of studying. Many showcase different study techniques.
The example study with me video below has hundreds of thousands of views.
3. Video Teaching Meets the Majority of Learners’ Needs
Visual cues help us better retrieve and remember information. The right visuals can make abstract or difficult concepts more tangible and easier to remember.
Using visuals effectively can decrease learning time, improve comprehension, enhance retrieval, and increase retention, according to Psychology Today. Video is one of the ultimate visual information delivery systems, so it only stands to reason that effective video teaching can produce the same results.
As any teacher knows, there are three main types of learners: Visual, auditory, and kinesthetic. Visual learners account for 65% of the population and auditory learners make up another 30%. Because video combines both visuals and audio, it gives educators the opportunity to reach 95% of learners (even when those learners are remote).
This makes video a truly multimodal learning format, allowing teachers to share concepts using multiple channels of information all in one.
4. Video is Highly Engaging
Combining visuals and audio, it’s no surprise that video is an incredibly engaging format. On social media sites like Facebook, it receives more engagement than any other type of post. Now think about the popularity of TikTok, Instagram, and Snapchat.
I know, I know, why should you care about social media? Because your students do. And video is most often what they seek out when they go to social networks.
Video doesn’t just engage the senses. It makes people feel something. After all, 70% of Canadians said they felt empowered, motivated or confident after learning something new from a YouTube video.
5. Video Improves Learning Retention
Why is video such a popular choice when it comes to learning? That might just be because it works.
Viewers actually retain 95% of a message when they watch it in a video compared to only 10% when reading it in text.
This is likely because video makes the complex simple. It’s much easier than other formats to explain complicated things or even demonstrate abstract concepts.
Knowing that, consider the fact that eLearning enables students to learn 5x more material for every hour of training. Think about this: What’s possible when you pair video with other digital learning tactics?
Students learn faster and more thoroughly.
6. Video is More Flexible and Accessible for Students
Video gives teachers more learning options and students more flexibility.
Live calls are great, for some things, but anyone who’s tried to hold the attention of a class for longer than about an hour knows there are limitations.
And that’s not even mentioning issues around student access. After all, not every student has access to enough bandwidth to be able to join live video classes. And, those who do may not be able to do so at a particular time due to siblings or even parents using devices or wifi.
Asynchronous video, which is pre-recorded and shared for viewers to watch on their own time, provides students with the flexibility they need to learn when they’re able to. It also works easily across devices, unlike text-based content like PDFs, which don’t scale well, making them difficult to read on the smartphone screens many students may be using for their studies.
It also lets them learn at their own pace, pressing play, pause, and rewind as needed without the deterrent of feeling like they’re interrupting the whole class or holding everyone up.
Plus, depending on what video platform for education you use, students may also be able to take advantage of playback speed controls, which allow them to speed up or slow down video content. Speed controls, combined with the ability to rewatch content, can be particularly valuable for students with disabilities, especially those who have processing delays.
Asynchronous video is also more accessible. Unlike live video calls, recorded asynchronous video allows for closed captions, which can ensure all of your students (including those who have hearing impairments) get equal access to an education.
It also can enable an effective flipped classroom. Let’s say you can only manage one hour of video conferencing per day, so you pre-record lessons as asynchronous videos which you share with your students to watch ahead of time. Then, during your live chat hour, you can answer questions and foster group discussion to help make what students have learned stick.
7. Video Helps You Support Parents
Students aren’t the only ones doing their work from home. Many parents are working remotely as well. But, they’re also supporting their children’s learning. These layered responsibilities can make scheduling and time prioritization tough.
Sending your lessons, answers to questions, and more as videos lets you support parents so they can support your students.
Unlike a live call, recorded videos can be shared with parents so they know exactly what their child is learning and be better equipped to help them.
8. Video is Reusable
If you teach young children and have decided to split them into smaller groups to improve engagement, video is a very time efficient solution.
(Sidenote: One kindergarten teacher I know spends her days jumping from one video call to the next, because she’s split her class into four disparate chunks. That way she’s never teaching more than five five-year-olds on a single video call. But it does mean she ends up repeating the exact same lesson four times over.)
Why? Because you only have to make the video once, then you can use it again and again. Whether it’s a screen recording of slides for a lesson or a short one-to-one video you sent to a student to answer their question, whatever you make you can reuse.
Plus, in cases where you do run a lesson as a live video call, you can also record and share that recording for students who couldn’t attend or need to review.
9. Anyone Can Do It
With easy DIY video tools in abundance, you really don’t have to be a professional or have a ton of training to create videos.
It can be as simple as clicking record on a webcam or screen share and just doing it.
What matters more is caring about what you’re talking about and being enthusiastic. Why? Content about passions is 3x more important to viewers than content with famous actors.
Video for Education Made Easy
Expand your virtual teaching toolkit. Easily create and share videos with students.
Sign Up Free
How Can I Use Recorded Video in My Virtual Classroom?
Ready to give video teaching a try, but not quite sure where to start? Don’t worry, we’ve got plenty of ideas to share on how you can try using video in the classroom.
1. Record Video Lessons
Many teachers are using video calling tools like Zoom to do live lessons and that’s great. But there are limitations to how far you can get with it.
Depending on internet bandwidth or available devices (which they may be sharing with parents and siblings), students might not have the capacity to join a live call.
Additionally, having more than 20 kids on a call can make it incredibly difficult to capture and keep their attention and corral those who might be causing distractions.
Pre-recording a video lesson, on the other hand, lets you teach at a time when it works best for you and allows students to learn at a time that works for them.
How do you do it?
Screen recording is a great way to get started (especially if you feel a little camera shy). Create some slides that cover your lesson content, then use a screen recording tool (like Vidyard’s free Chrome extension) to make a recording where you narrate over your presentation.
If you feel comfortable enough, you can even add a little bubble that records your face via your webcam. It’ll appear on your video, letting students see your face, making it even easier to connect with you and the lesson.
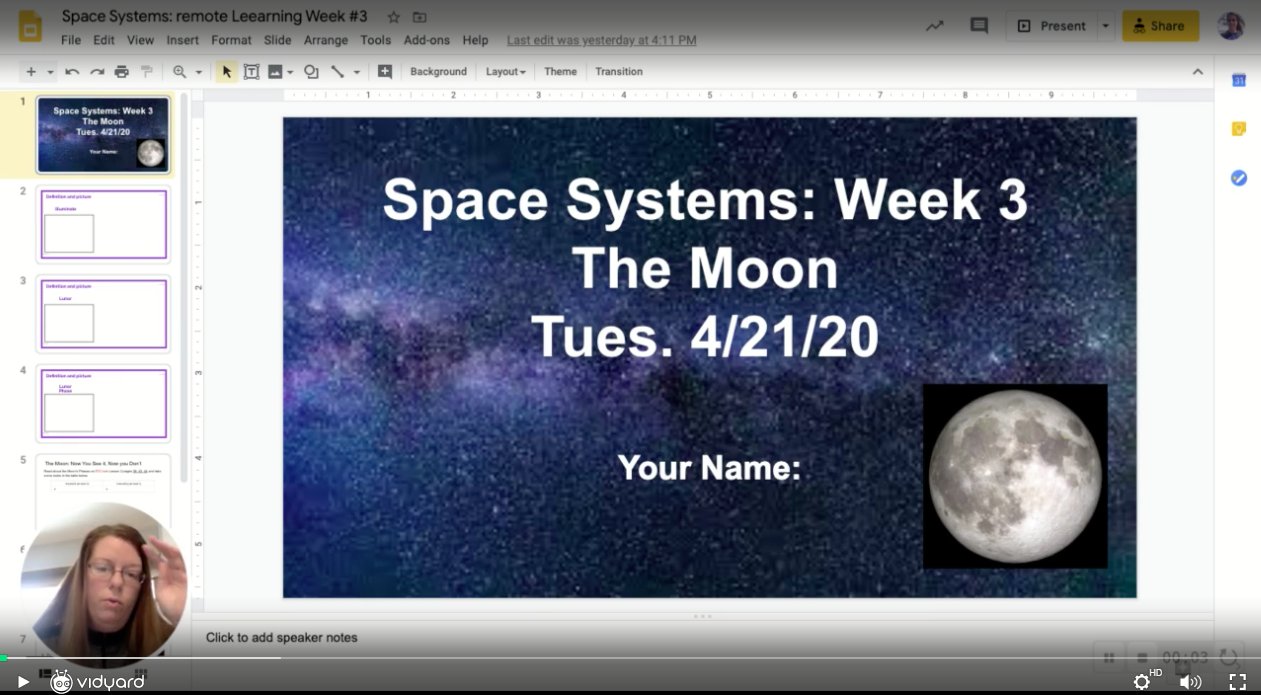
What Screen Share Video Lessons Can Look Like
Middle school science teacher Michelle Anderson used Vidyard to create mini-lessons for her students on topics like space systems.
Depending on what you’re teaching and if you need to be able to demonstrate it, you could also try a straight webcam recording. For instance, if you were walking through a science experiment in your kitchen, you could set your computer on the counter and record your lesson from there.
Need to walk students through a math problem or teach something that involves a chalkboard or whiteboard (even if you don’t have one on hand)? You can use a pencil and paper paired with a webcam or smartphone and simple tripod to replicate the experience.
Other options include using a virtual whiteboard app and recording a screen share video where you narrate what you’re doing and describe the thought process.
Recording video lessons lets your students watch, rewatch, rewind, and pause your video so they can learn at their own pace. Because of this, you can also save time answering the same questions over and over again. After all, when it’s easy to rewind, students never have to ask you to repeat yourself.
2. Record Assignment Instructions
Even if your actual assignment or exercise will be presented in another format (whether written, video call, etc.), you can still use video to record the instructions for it in a format that’s quick and clear.
Video makes it easy to explain complex topics simply. Use this power to make sure that students understand what you’re asking them to do.
In only a couple of minutes, you can clearly outline expectations, due dates, grading rubrics, and any other pertinent information that students need to know.
You can also give students an assignment instruction video in addition to traditional written directions. If you typically deliver assignment information via live video calls think of this as the on-demand version. This approach helps ensure that none of your students will miss a thing.
Plus, students can share the instruction video with parents who may be helping them at home. This makes it easy for them to get the information they need right from the source, without “playing telephone.”
3. Answer Questions Clearly Using Video
Now, more than ever, it’s likely that students have questions. Unlike in the classroom when they can just toss their hand in the air or walk up to your desk to get clarification, this process can be a little tougher in a virtual classroom.
Get that personal interaction back when you share answers to those questions by recording your webcam or screen in a quick video that explains what they need to know.
As a bonus, if more than one student has the same question, you can simply share the same recording with them all, minimizing the time you spend on back-and-forth.
4. Turn Classwide Announcements into Videos
Sharing an important update or announcement with your class? Don’t worry about getting everyone on the same call or whether or not they’ll read your post in the class forum.
Just record a quick video sharing your message and send it out.
With a video platform for education like Vidyard, you can even see which students have watched the video. Knowing who hasn’t seen it yet makes it easy to follow up.
5. Provide Students with Useful Feedback
Whether your students completed a project, delivered a presentation, or wrote an essay, feedback is essential to the learning process so they know what they did well, what they need to work on, and how.
Rather than simply publishing a grade or sending some form of text-based communication, make sure your feedback comes across as warm and helpful by recording a video. This format ensures that they don’t miss the in-person cues like tone and body language that they’d normally get with their feedback.
Plus, it makes it easy for you to coach them through any specific feedback so they can continue to learn and grow.
6. Share Asynchronous Video Updates with Parents
In a world where parent-teacher meetings are made all the more difficult to schedule and execute, asynchronous video can make it easier for you to share important feedback with parents.
Whether you’re sharing concerns, letting them know about progress, or sharing an update, recorded video can help.
You can also use asynchronous video to create instructions or share guidance directly with parents for how best to support their child in digital learning.
7. Make Live Video Calls Available On-Demand
If there’s something you need to teach in real-time or requires student interaction, but you know there are students who can’t make it or who may want to review the material later, you can record the session to make it available on-demand.
Most video conferencing software includes a record option. Simply select that at the beginning of your call to start recording. Afterward, upload your recording to your video platform for education to make it available to students.
8. Create ‘Virtual Field Trips’ Using Video
Whether you had a specific outing planned or not, no one can go anywhere right now. But that doesn’t mean the fun and learning that happen on a field trip has to be put on hold.
Try creating a virtual field trip experience using tools like Google Earth or Google Arts and Culture, combined with multimedia presentations. Start a screen share recording and narrate away to create a virtual field trip video students are sure to enjoy.
9. Use Video as Part of a ‘Flipped Classroom’
Flipped classrooms are gaining in popularity. In a flipped classroom, students consume learning material on their own time, then spend face-to-face time discussing the subject, working on questions, or interacting with the teacher.
Video is a great way to make flipped classroom learning possible. You can send lectures as asynchronous videos for students to consume at their own pace. Then, during your class video call, you can focus on topic discussion or questions.
This is a great way to make the most of face-to-face time, especially in a remote learning environment.
10. Give Students Video-Based Assignments
Depending on the age of your students and your comfort level with having them use new tools, getting them to create a video as part of an assignment could be a fun project. (Note: Vidyard requires users to be age 13 or up.)
Not only does this give your students a chance to work on their digital literacy skills, because it’s a fun activity, it may also help better engage them with their schoolwork.
What kinds of assignments could you have students do as videos? Instead of delivering a presentation to the class, you could have them narrate a recording of their slides. Instead of acting out a scene from a play as a group in front of the class, you could have students do individual readings or even record themselves delivering lines to cut together into a cohesive clip.
There are a ton of possibilities.
Video for Education Made Easy
Expand your virtual teaching toolkit. Easily create and share videos with students.
Sign Up Free
How Do I Make Educational Videos?
Not sure how to make educational videos? Don’t worry: Making videos can sound intimidating, but it doesn’t have to be. Anyone can make videos and, by following you a few simple tips, you can ensure yours help your students learn.
1. Choose the Right Place to Record
When deciding where to record your video, think about sound first, then lighting and other visuals second.
Whether you’re on camera or narrating a screen recording, you want your audio to sound as clean as possible. To do this, try to choose a quiet spot to record. If available, select a place in your home that isn’t high traffic or near noisy appliances (like a dishwasher or dryer). If you have them, use headphones with a microphone to record your audio.
If you’ll be on camera, try to select a spot with natural light, if available, or where you can have light in front of you rather than directly above or behind (like a lamp, for instance).
And finally, aim to choose a spot where your background won’t be distracting (or declutter whatever spot has the best lighting).
If you’re screen recording, make sure you only have what you’ll be presenting open in your browser window. If you’ll be screen sharing more than one tab, try to organize them in the order you’ll open them when recording. If you’re sharing slides, have them open and ready to go before you hit record.
2. Keep It Short
If you’re planning to shoot a lesson video, try to split it into smaller chunks. Shorter videos have better viewer retention, so this makes it more likely that students will watch the entire video.
For instance, if you’re doing a lesson on renewable energy, break that into separate mini lesson videos like solar energy, hydroelectric power, and so on.
Aim to keep each video in your longer less around six minutes as that length has the best retention rate for students. Nearly 100% of students will watch a six-minute video all the way through, whereas only half will finish one that’s nine to 12 minutes long.
In addition to keeping your video content short, do your best to make sure each video is focused on your key learning objectives.
3. Make Content Easy to Digest with Playlists
If you create short, bite-sized videos that teach different portions of a lesson, you can use playlists to pull all of those separate pieces together and organize the content.
This makes it easy for students to navigate the material as the videos can be arranged to flow naturally into one another. It also means you only have to share one link for an entire lesson, rather than sharing a plethora of individual video links.
It also gives you the chance to use segmenting, say the authors of a paper about using video in education. This “allows learners to engage with small pieces of new information and gives them control over the flow of new information,” in your lesson.
Segmenting helps manage a couple of types of cognitive load that can make it easier for students to both understand and retain material by emphasizing the structure of the information.
4. Be Authentic and Show Enthusiasm
Try to be conversational when you record your videos. Whenever possible, talk directly to students by using phrases like “you should” rather than “students should.”
It can be tempting to write out exactly what you want to say word-for-word, but try to resist because it’s likely to come out a lot more formal than you intend.
Instead, make yourself a few notes so you remember what you want to cover, then just explain it as you naturally would at the front of your class.
Speaking of being at the head of the class, same as when you’re in the classroom, you’ll want to show your passion and excitement for the topic at hand in your videos.
Students are more likely to engage when they think you’re engaged as well.
While it might be tempting to speak slowly, one study actually found that “increasing narrator speed appears to promote student interest.” So don’t be afraid to get excited and talk faster. Your students will appreciate it.
5. Think About Video as a Distinct Format
There are things that video has that other formats lack. Be sure to think about what these are and use them to your advantage.
One of the chief among them is that video combines both audio and visuals. Use both to effectively convey and reinforce your message. Consider how these elements can work together in a way that’s complementary rather than redundant.
Basically, if you’re doing a screen share, don’t just make slides that are a mass of text and then read out that same text. Include some text on screen along with other visuals and convey the depth of information verbally.
You can also use signaling in the visual aspect of video to highlight important ideas or concepts. This could be as simple as changing the color or contrast of the on-screen text in a screen share video to help students remember a key term or concept. You could also designate a symbol to indicate when something is important to remember.
6. Ask Questions and Add Activities
As with all education, it’s critical to apply continued questioning to your video teaching in order to encourage deeper learning and establish a growth mindset.
You can do this by asking questions at the ends of your video lessons and, where possible, making video part of a larger homework exercise, such as a series of questions or problems.
This engages students in the material and can increase learning retention.
7. Ask Students What They Think
Educators well know that not everyone learns in the same way. Every student has learning styles where they excel and others where they struggle. If you’re working on the principle of Universal Design for Learning, then a format like video that addresses multiple modalities may help you address different learning styles.
As with any learning method or tool, it’s about testing out video as part of your broader teaching approach and seeing if it works for you and your class, and, if yes, where it fits best.
This is an odd time and we’re all doing the best we can with what we have. You’re trying something new, so don’t be afraid to ask your class: How is this going? Are these videos helpful?
Use their feedback to guide how you move forward.
Why Should I Use a Video Platform for Education?
Do you actually need a video platform for education to all of this? Can’t you just use YouTube?
Yes, you can, but with a couple of important caveats.
YouTube is not a secure platform. Anyone can upload whatever they want, which increases the chances that your students will be exposed to misinformation, extremist viewpoints, adult content, violent content, and other concerning videos.
YouTube’s recommended videos feature can lead students down a rabbit hole of not-so-related videos rather than keeping them on track with your video lessons.
A secure video platform for education solves both of these issues. Security features ensure that only your students have access to your content.
Plus, a video platform for education not only makes video sharing easy, it can also help you with video creation.
Vidyard has a free Chrome extension that lets you record webcam or screen share videos in only a couple of clicks—no video production expertise required.
You can also upload other videos and easily manage and organize them all.
Video for Education Made Easy
Expand your virtual teaching toolkit. Easily create and share videos with students.
Sign Up Free
The post Video Teaching: How to Use Video in Your Virtual Classroom appeared first on Vidyard.
Read more: vidyard.com


