
[ad_1]
Want to add Google Search Console to WordPress and need the exact steps?
You’re in luck.
In this post, we cover every method there is to verify your WordPress site with Google Search Console (formerly known as Google Webmaster tools).
You’ll also learn:
- The difference between verification methods
- How to view Search Console reports inside WordPress
- How to add a sitemap
- The benefits of adding Google Search Console
- And much more…
Let’s dive in.
3 Ways to Add Google Search Console to WordPress
There are a few ways to verify your WordPress website in Google Search Console.
Each method may provide different search data, depending on which one you choose or the URL you target.
Let’s take a look at each method now and follow the steps to add Google Search Console to WordPress.
1. Newest Method: Domain Verification
Domain verification is the most recommended verification method because it covers all subdomains and URLs, including www and non-www versions.
This method doesn’t even require you to do anything with WordPress. That’s because you verify through your domain.
It also includes all HTTP variations, which is good for ensuring your site is redirecting to its HTTPS version.
Follow these steps to use this verification method.
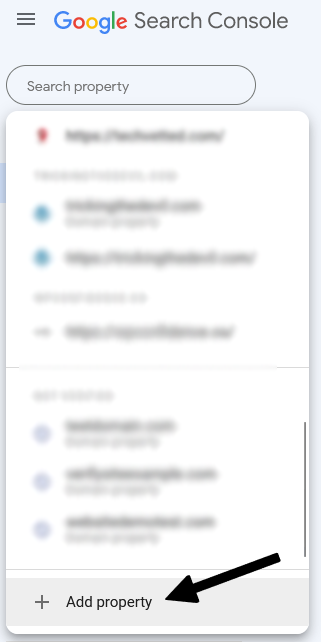
First, log in to Search Console and add a property by clicking on the list of properties drop-down box and clicking Add property:
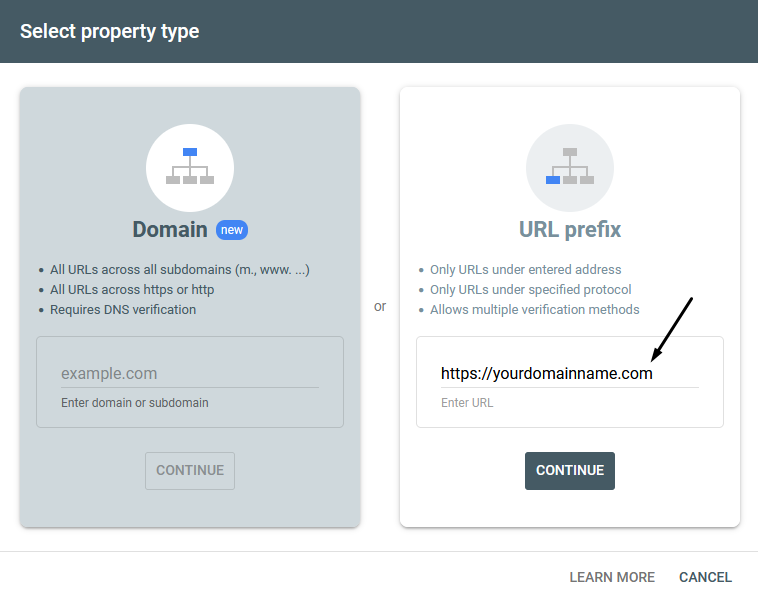
Next, in the popup box, under Domain, type your domain name without the HTTPS or www and click CONTINUE:

Now go to your domain registrar account to add a new DNS record.
I’m adding mine in Namecheap, but it’s similar to most registrars.
Use the following settings when adding a DNS record:
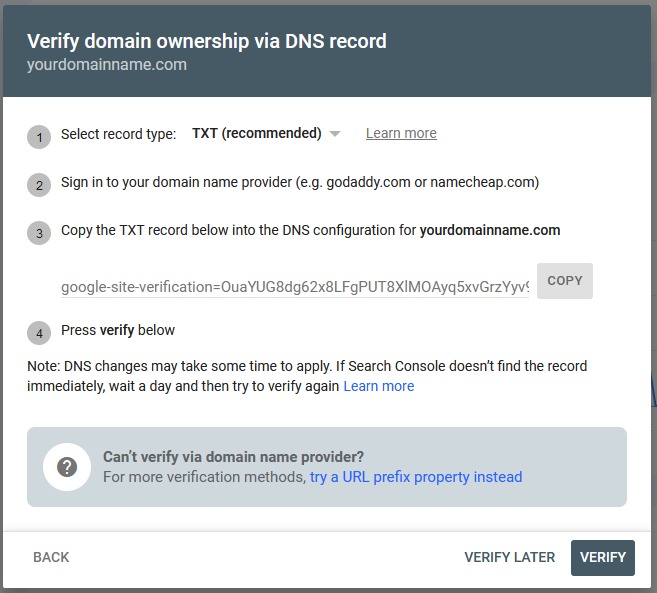
- Under DNS type, choose A Record
- For Host, use the @ symbol or leave it blank for some registrars
- Copy and paste the text provided by Search Console in the Value field
- For TTL, choose the lowest number
After you’ve added the record, go back to Search Console and click on VERIFY.
It can take anywhere between a few minutes to several hours for the verification to be recognized.
However, once your domain is verified in Google Search Console, it will start collecting search data and display it within a few days.
2. Older Method: Site Verification Through Meta Tag or HTML File
These verification methods allow you to target a specific page or area of a website.
For example, if you only want to collect the data of a specific blog post, product category, or subdomain.
This is helpful if you want to monitor sections of your site’s data separately from the rest of the site.
The first way requires you to upload an HTML file to your web hosting account, and the other is to add a meta tag to WordPress.
Verify Google Search Console with HTML File
First, log in to Search Console and add a property by clicking on the list of properties drop-down box and clicking Add property:
Next, in the popup box, under URL Prefix, type the URL exactly how it displays in Google’s search results and for the data you want to track:
To verify with an HTML file, click the Download the file button and upload it to the root directory of your WordPress installation.
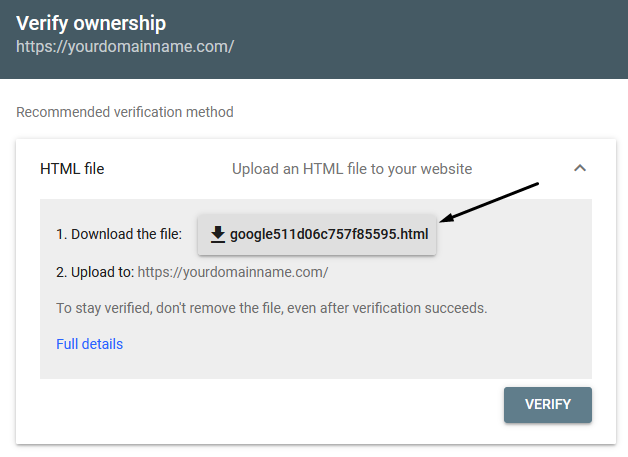
You can do this by connecting through an FTP program. Then go back to Search Console and click on VERIFY.
Verify Google Search Console with Meta Tag
The other method is using the meta tag which you can add to your WordPress theme.
Instead of choosing the above option, select the HTML tag under “Other verification methods” and copy the code:
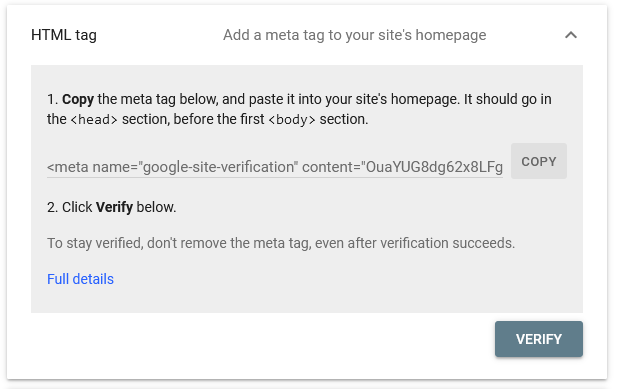
You can add the code manually or use a plugin. To add the code manually, follow these steps:
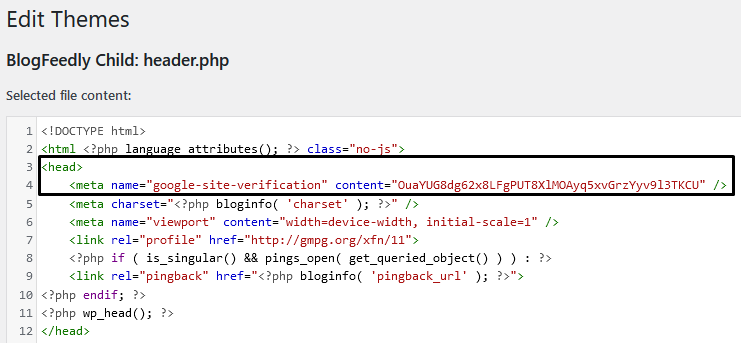
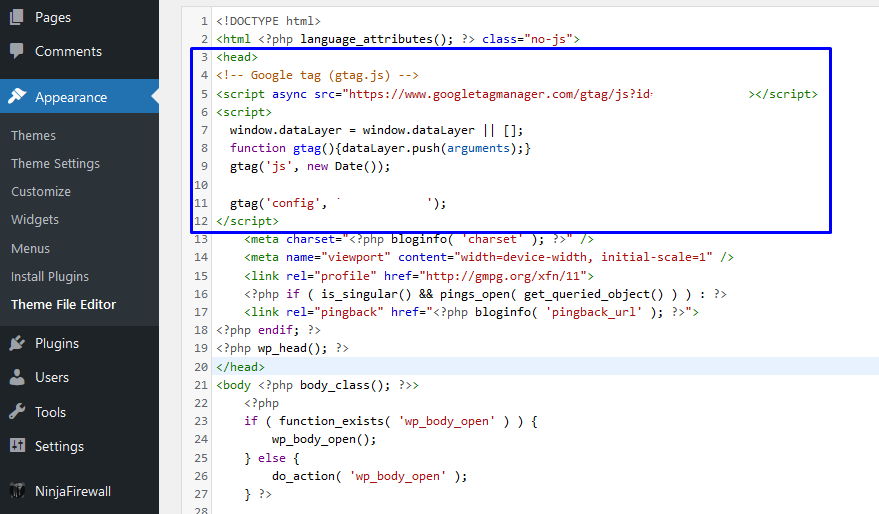
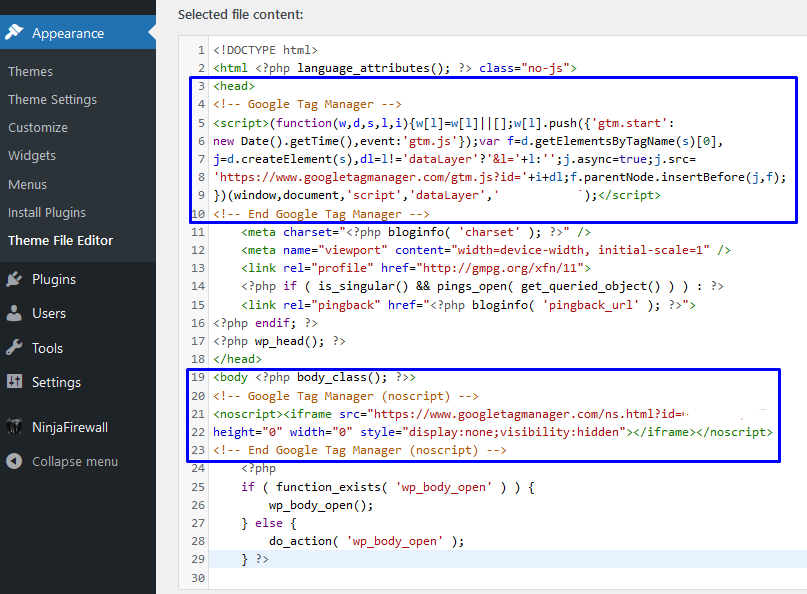
Inside your WordPress admin, go to Appearance > Theme Editor and choose the header.php file.
Just make sure the header.php file you edit is a child theme and not the main theme. Otherwise, it will get overwritten when the theme updates.
Paste the code after the HEAD tag:
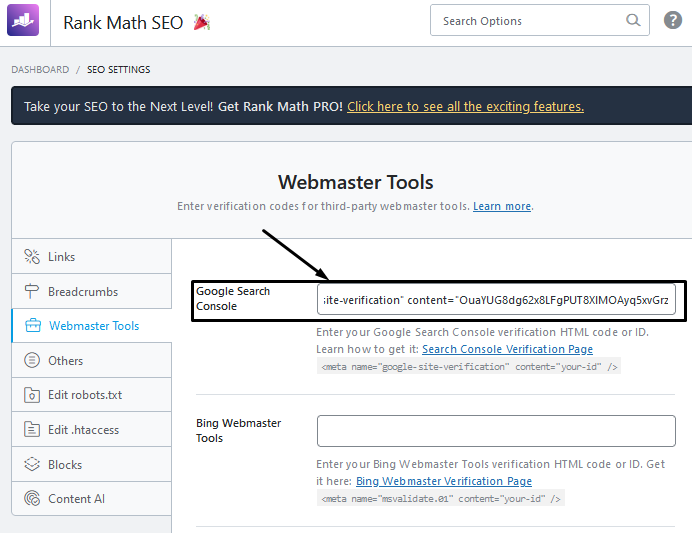
If you want to add the code with a plugin, here are several plugins that support it:
To add the HTML tag with an SEO plugin, some will only need the characters between the content quotations, whereas others require you to paste the entire code in:
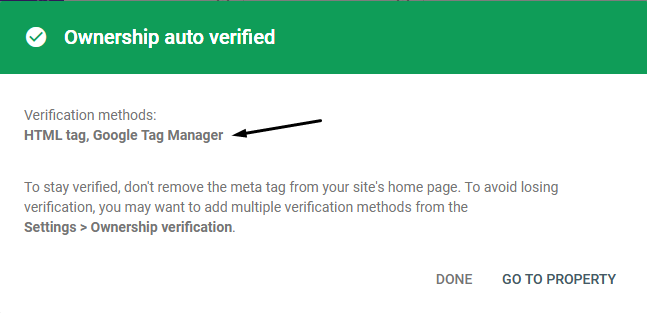
Once added, go back to Search Console and click on VERIFY.
Your search data will start showing up after a few days. Note that you’ll need to keep the HTML file or meta tag in place to keep verification active.
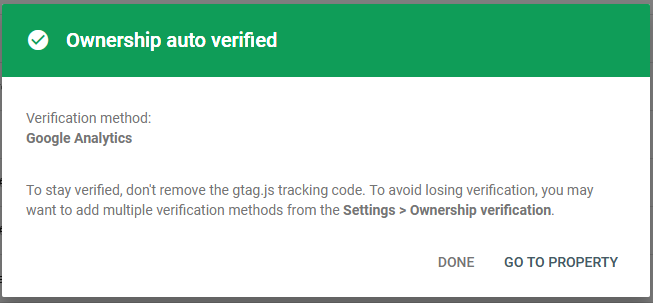
3. Alternative methods: Google Analytics or Google Tag Manager
These methods are fairly straightforward if you’ve already added Google Analytics or Google Tag Manager to your WordPress site.
That’s because you’ll get a verified popup for the respective Google service when you add your property to Search Console.
If you want to verify Google Search Console this way, here’s how to add the code in WordPress.
For Google Analytics 4, navigate to your Web Stream details and view the tag instructions. You see your code like this:
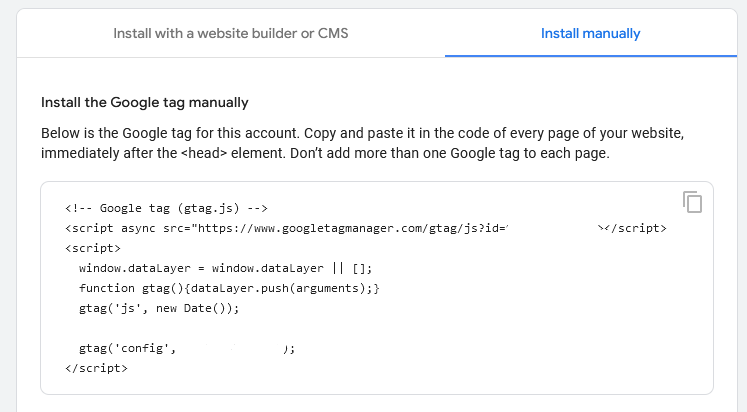
Copy the code and paste it directly after the HEAD tag in your WordPress theme:
Again, make sure you’re editing a child theme and not the main theme.
You can install a child theme easily by using a WordPress plugin called Child Theme Configurator.
If you prefer using Google Tag Manager, here’s how you can add the code manually.
Add your property in Tag Manager, and you’ll see this popup:
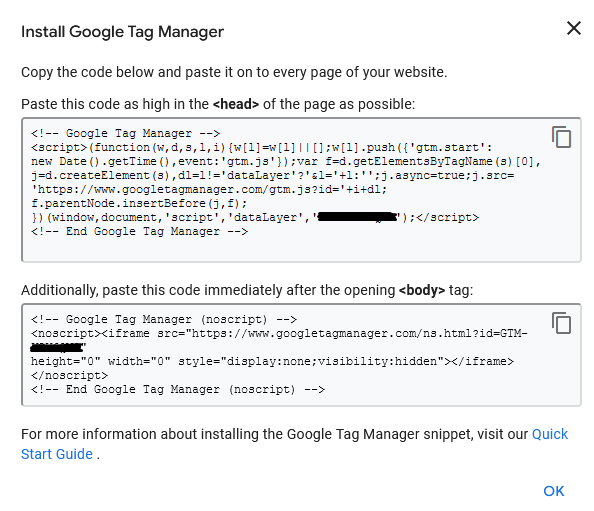
Copy the first box and paste that directly below HEAD the tag. Then paste the code from the second box below the BODY tag.
You’ll now see the verification boxes above when you add your property in Search Console.
How to View Search Console Data Inside WordPress
If you want to see Search Console data inside your WordPress admin, then you’ll need a plugin for that.
The best we have come across is Rank Math, which lets you see up to 90 days of Search Console data for free.
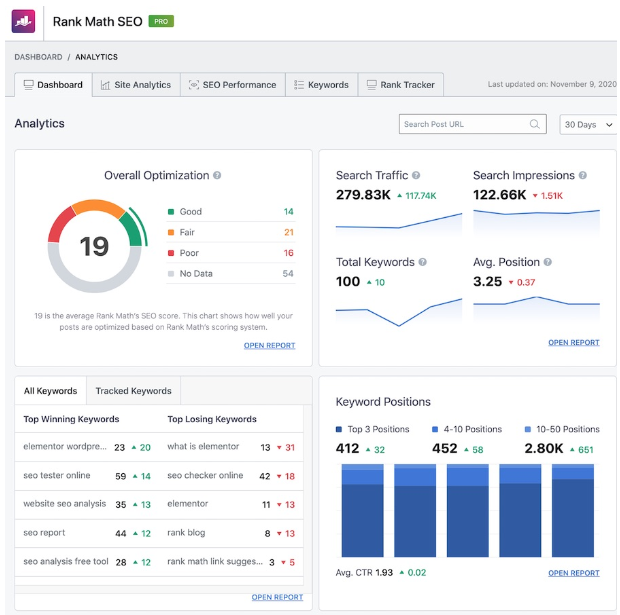
But you’ll need the pro version if you want more data, like a keywords report overview.
What if you’re using a different SEO plugin, like YoastSEO? If you really want to see Search Console data in WordPress, then we recommend MonsterInsights.
MonsterInsights isn’t free, but it means you’ll be able to use it with Yoast.
The other option would be to change SEO plugins to Rank Math, just make sure you know what you’re doing. Otherwise, you can change how your metadata is displayed.
Why Add Google Search Console to WordPress?
The main reason you would add Google Search Console to your website is to measure organic search performance.
Other benefits include:
- Adding an XML sitemap
- Check which pages are indexed
- Monitor Core Web Vitals
Here’s what you’re able to track regarding Google search rankings
- Google search impressions and rank positions
- Search clicks
- Google search CTR
- Ranking keywords
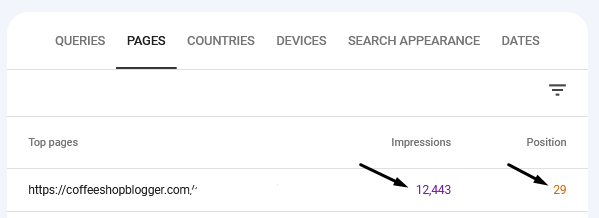
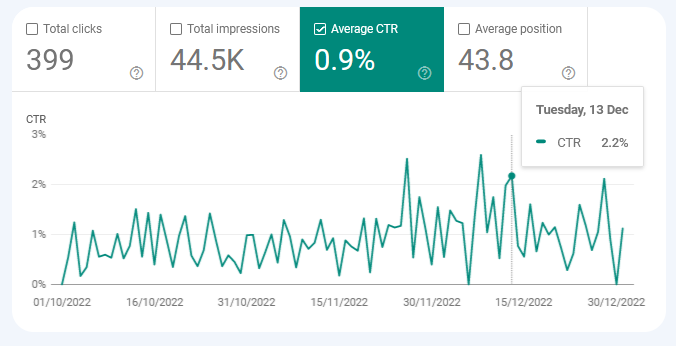
Google search impressions show how many times your website is seen in Google search results. The average position is the overall position your entire site shows up at.
You can see the average impressions and position for individual pages under the pages tab:
Total clicks are the number of times people click through to your website from search results:
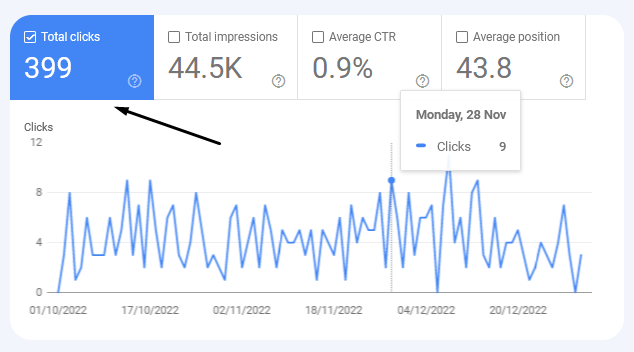
Average CTR is the percentage of clicks compared to the number of impressions. So if you get 100 impressions and 10 clicks, your CTR would be 10%.
Ranking keywords are the terms your website has shown up for when people have searched for those terms in Google.

You can get an overview of all the keywords or select a specific page from the pages tab, then go back to the Queries tab.
Keeping track of this data every month will help you make improvements to your site’s search engine optimization.
How to Add an XML Sitemap to Google Search Console
Adding an XML sitemap to Google Search Console helps Google find all the pages and articles on your website.
To add your sitemap, you must install a plugin that automatically generates one.
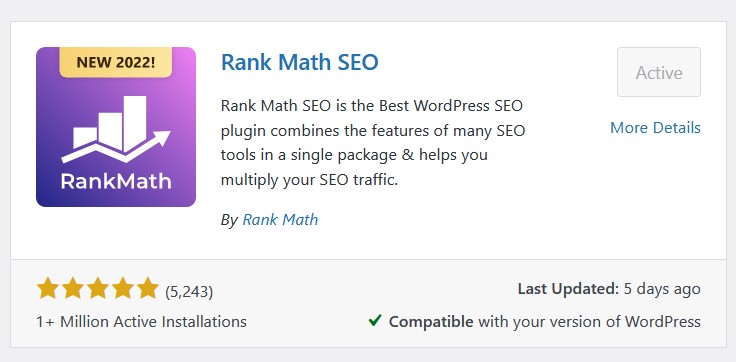
Most SEO plugins will do this. For this example, I’ll show you how to do it with RankMath.
Search for, install, and activate the RankMath plugin from your WordPress admin:
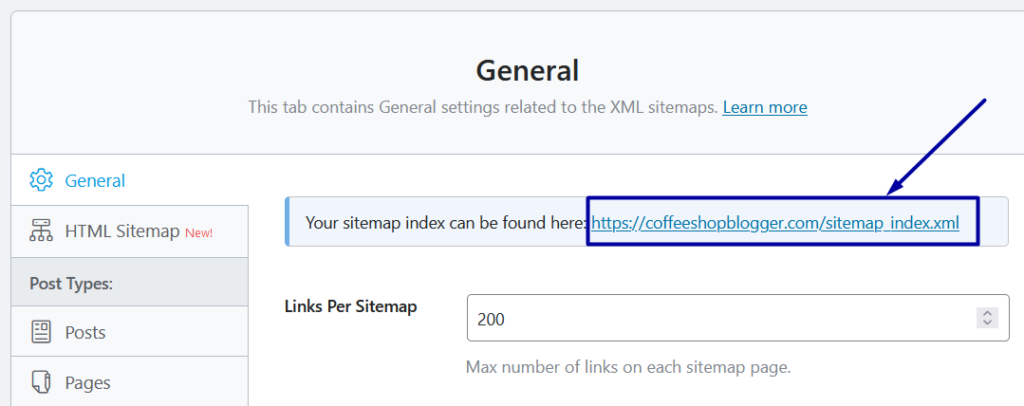
Once you’ve configured the RankMath settings, go to the Sitemap settings option and copy the sitemap URL:
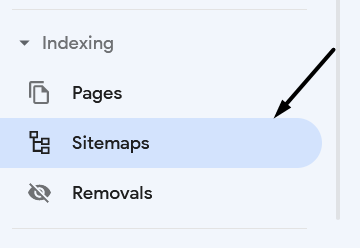
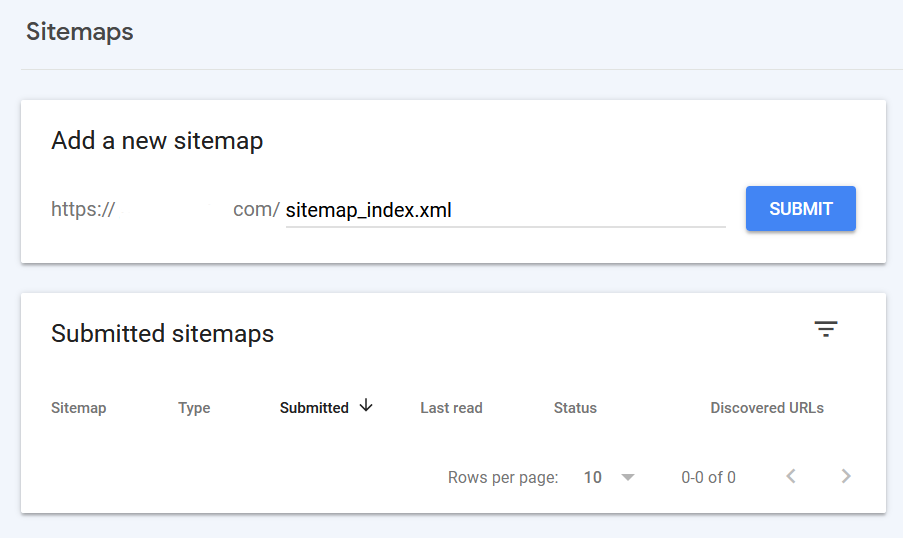
Then head back to Google Search Console and navigate to Sitemaps under Indexing:
Then, type or paste the sitemap slug in the URL field and click on SUBMIT:
You’ll see a box with some details of when it was submitted, the status, and the number of discovered URLs:
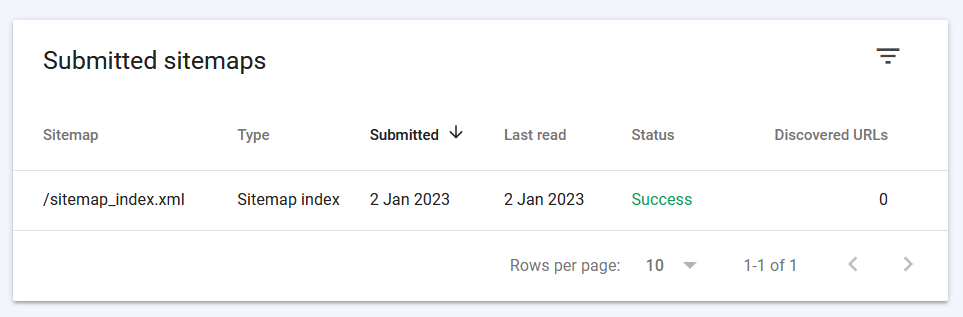
Google bots will crawl the sitemap each time you add new content to your site, which will help keep your Search Console data up to date.
How to Associate Google Search Console Data with Google Analytics 4
When you connect Google Search Console with Google Analytics, you can access the Search Console data inside your Google Analytics account.
Here’s how to do it.
In your Google Search Console account, go to the Settings page in the sidebar and click Associations:
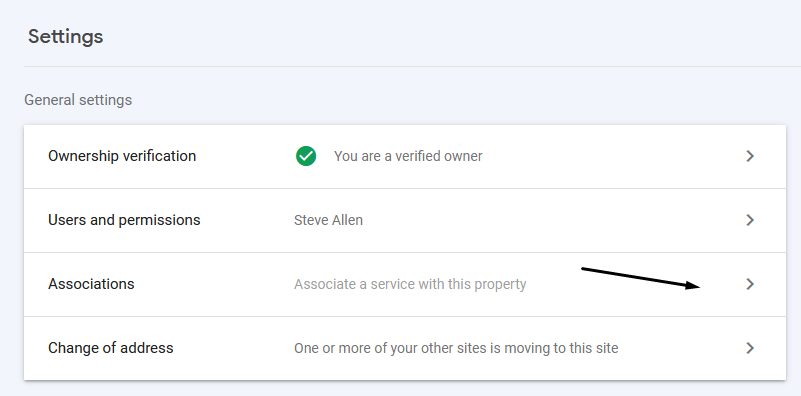
Then click the ASSOCIATE button where it says “Connect a Google Analytics property to this property”.
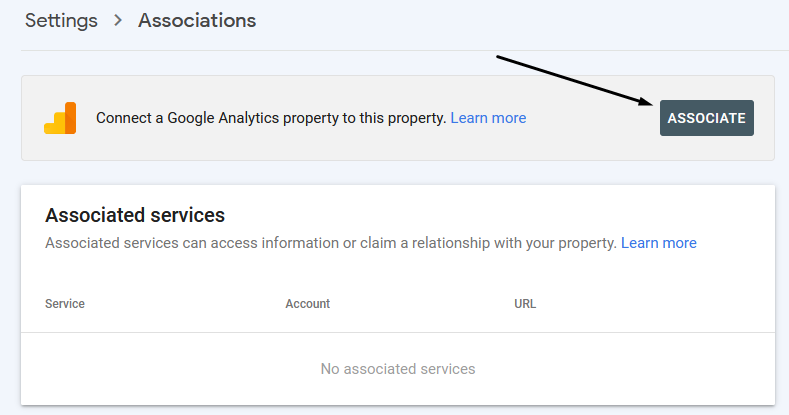
You’ll see a popup with all of your available Google Analytics accounts. Choose the one that matches the GSC property, click CONTINUE and follow the prompts.
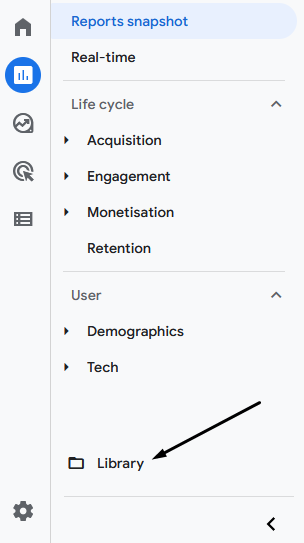
Next, go to your GA4 property and navigate to Reports > Library:
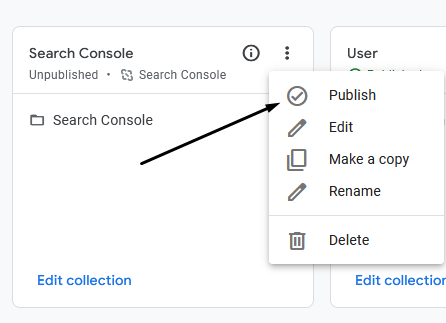
Then in the Search Console box, click on the 3 dots and click on Publish:
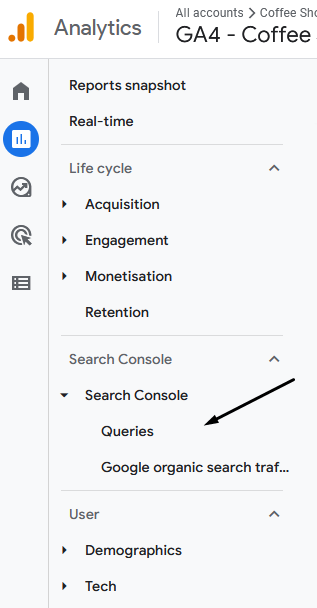
A Search Console option will appear left sidebar menu with links to display your search queries and Google organic search traffic inside Google Analytics:
Conclusion: Add Google Search Console to WordPress
As you can see from this post, adding Google Search Console is fairly straightforward when you know how.
Now you know how to add Google Search Console to WordPress, make sure you read our article titled, What Does Google Search Console Do?
And you’ll also be interested to learn how to increase organic traffic, once you know how to use Search Console.
[ad_2]
Source link


