Learning how to start a blog is 10x easier than it was in 2006 – when Affilorama was created. If you’re not savvy with website creation – and hate HTML – you’re going to love this post. Check out our four steps on how to start a blog.
Why you should start a blog
Before we jump into the meat of this post, it’s important you ask yourself:
“What is the goal of my blog?”
If you start a blog without a clear idea on what it’s going to be about, you’ll soon find yourself experiencing symptoms of what I like to call: writer’s block.
This is when you’re sucked dry out of ideas to write and hit a mental wall. I can admit, everyone gets it once in a while. But having it too often can make you bored to death by your own blog. And eventually you’ll abandon it.
To avoid that being the case, here’s a couple reasons to start a blog:
To just write. We all have something we’re passionate about. A blog is a great way to express your ideas and opinions on a certain subject, with people who also share the same passion.
Establish yourself as an expert. What’s even better, is sharing your knowledge to help other people in your niche. This way, you’re able to express your passion with the wider community whilst teaching people about it too.
And my favorite – make money from home. You can monetize your blog and make it a second source of income – or even make it a full-time business.
Best of all, you can even do both: establish yourself as an expert + earn money whilst doing it. This is what we religiously teach at Affilorama and is the BEST way to make the most out of your blog (more on this later).
Overall, having a main goal is crucial before you start a blog. Take the time to really decide what that goal is and how you can achieve it through your blog.
When you have, you’re now ready to start a blog.
Step #1: Choose a domain
The first thing you’ll need is a domain for your website.
If you’re not sure what a domain is, it’s just the name of a site – like www.affilorama.com.
I always recommend choosing a name that says what your blog’s about in a few words.
Here’s a few examples:
In 3 words or less, these domains are able to tell the reader what the site’s about.
Avoid using scammy names, like www.mysiteisabouthowtotrainyourdogs.com. Try keeping it simple (2-3 words), you don’t want to give your visitor a mouthful to read before they even land on your site.
Once you have a name in mind, double check that it’s available to use. I recommend using a site like godaddy.com.

Sometimes you might be unlucky and see the name you want is unavailable. In that case:
Try a different extension. If .com isn’t available, you can use another extension like .net, .org, .co.uk.
Choose a different name. If you have another domain in mind, use that one.
Add dashes or smaller words. Maybe the domain Affilorama is taken, but it may be available if you add dash in between words e.g. Affilo-rama.com.
Now you’ve chosen an available domain – buy it. It’s usually around $10 every year to keep your domain. I use GoDaddy.com, but there are cheaper alternative sites – like namecheap.com.
Step #2: Choose a hosting service
The next step is to set up hosting for your site. This way when your blog is ready, it’ll be accessible to view on the internet.
Choosing a good hosting is important because of two things:
1. You don’t want your site having downtime. Even having a 99% uptime isn’t enough – that’s 7 hours and 12 minutes downtime.
2. You’re in this for the long-run. Think of it this way: you’re going to be blogging for years to come – why settle for low quality hosting just because it’s cheap? Having episodes of downtime and general poor hosting can be costly, especially if your site is monetized.
One of the most popular hosting options – and the one I use – is hostgator.com, though there are many alternatives.
For this post, we’ll be using Host Gator.
First step: go to www.hostgator.com. When you land on the page, click the “Get Started!” icon:
(Be aware that based on the time you’re reading this post, the home page may not look exactly like this. Don’t worry, it’s still the same procedure.)
It should then take you to a page where you’re asked choose a hosting plan.
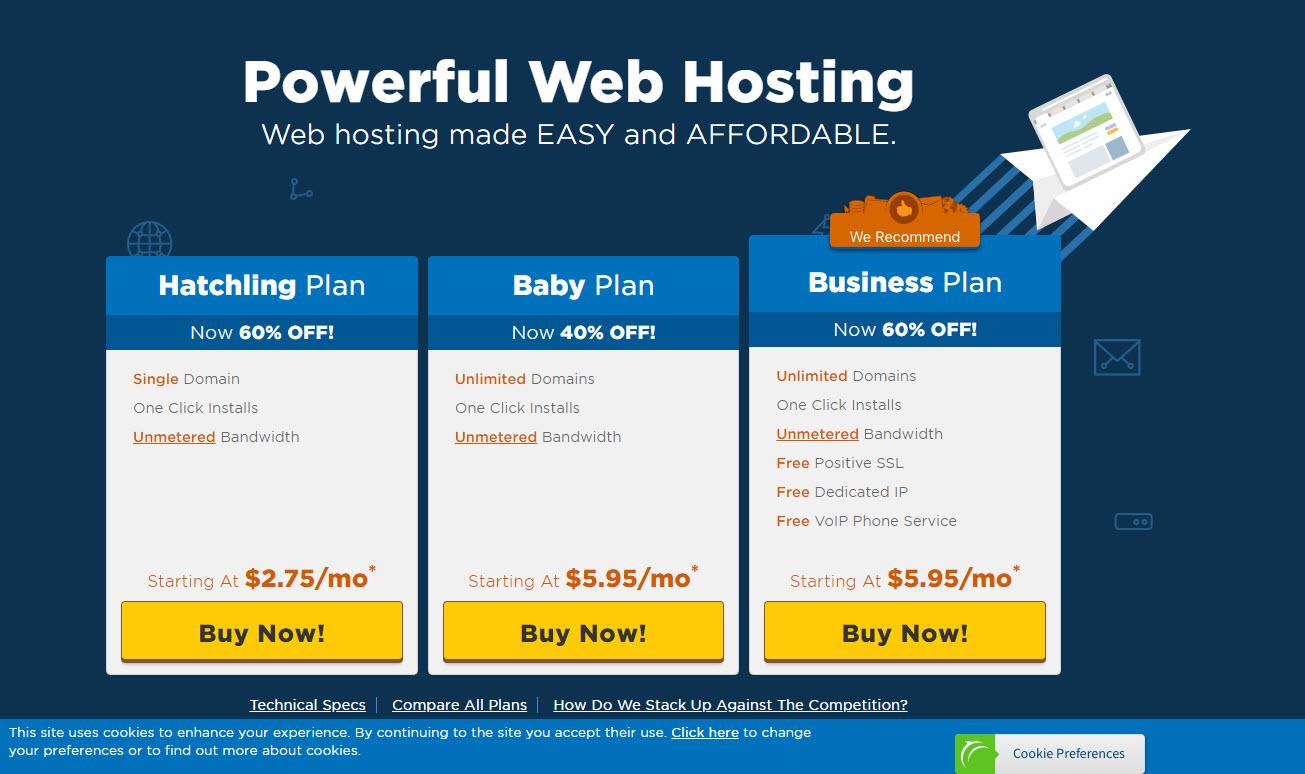
Since you’re just getting started, I recommend using the hatchling plan. You can always upgrade later on, but for now, your main focus is just to get started.
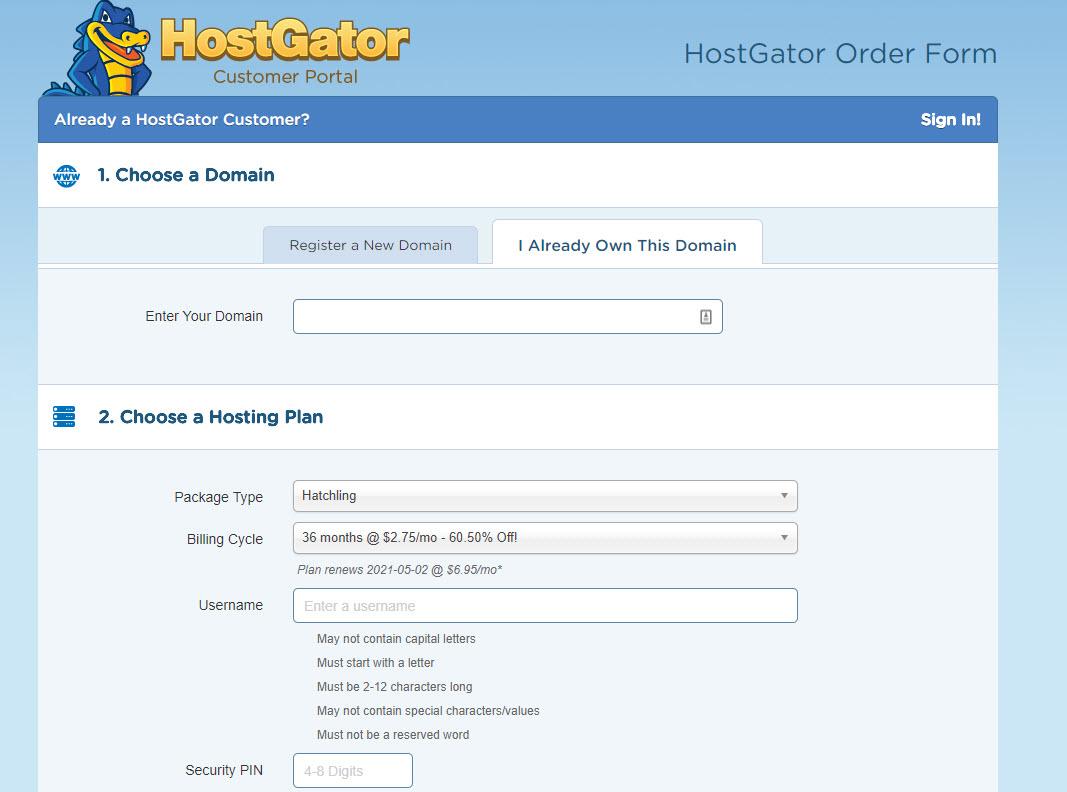
Be prepared to fill in your name, address and email plus some billing information to register with Host Gator.
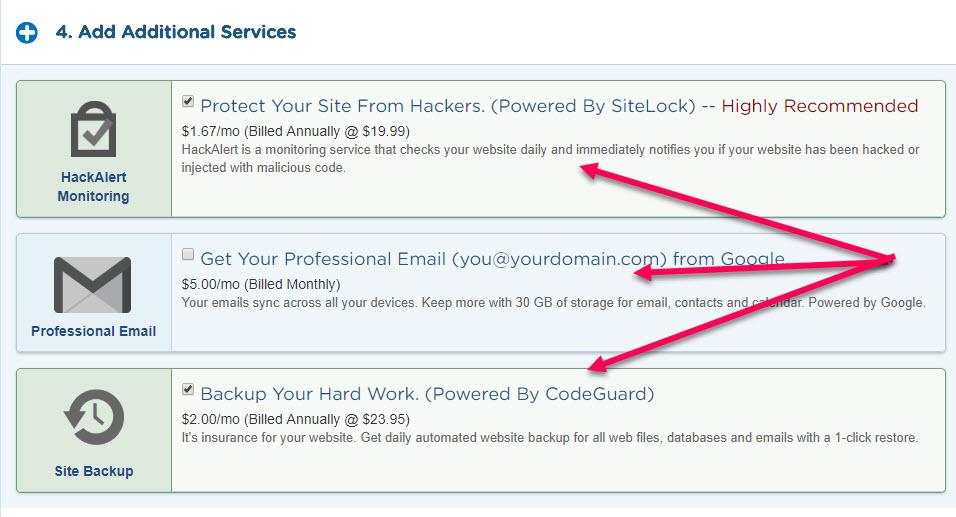
NOTE: At the bottom of the page, Host Gator will try to upsell you on additional services like professional emails and site lock monitoring. None of these are essential right now. But if you’d like to include any of them in your plan, feel free.
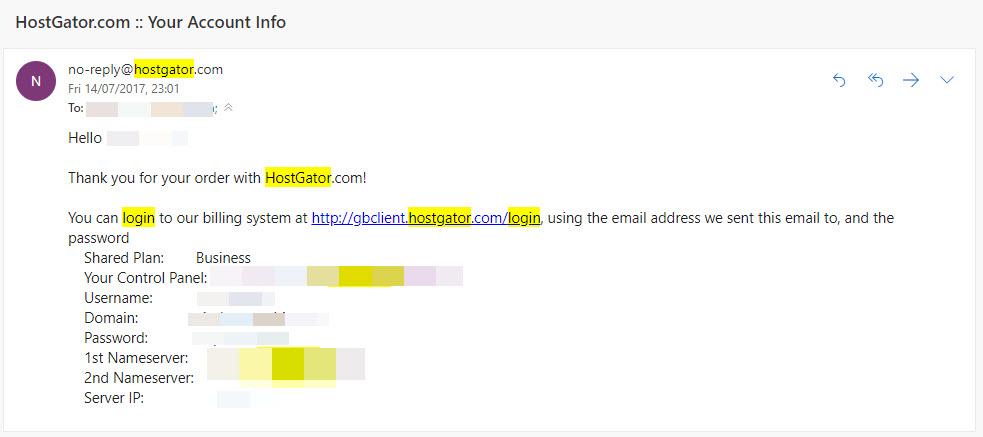
Once you’ve completed your registration, you should receive an email with your login details that look something like this:
Step #3: Build your website
Now you’ve got your domain and hosting in check, you’ll need a blogging platform to blog on.
“What is the best platform to use?”
Easy answer: WordPress.
Don’t believe me? Let the facts tell you:
WordPress runs 30% of the entire internet
WordPress gets downloaded roughly 1 million times every two days
Each month, 409+ million people view 19.6 billion pages
19,500,000 websites on the entire web use WordPress.
And there’s a reason why popular sites like The New York Times, Forbes and People Magazine use WordPress:
It’s FREE
Easy to use
Always being updated
And there are hundreds of customizable designs and themes to choose
And what I love about WordPress is you can download and use it inside HostGator.
To do this, you need to:
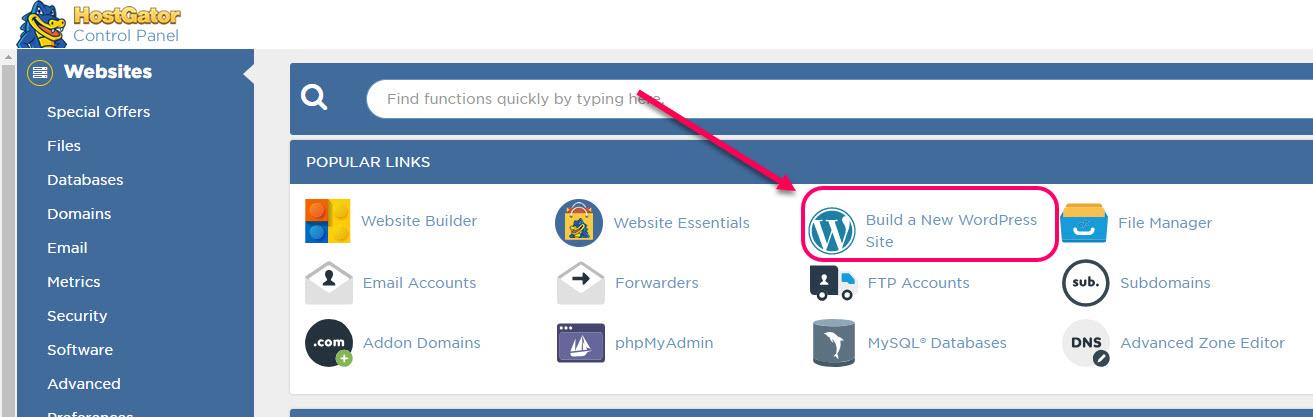
1. Log in to Host Gator (with the login details you received in your email)
2. On your control panel, click “Build a New WordPress Site”.
3. You should then be taken to a screen where you can install or import WordPress. Fill in the details asked for in the tabs, then “Install”. Then on the next page, click “Install WordPress” on the next page.
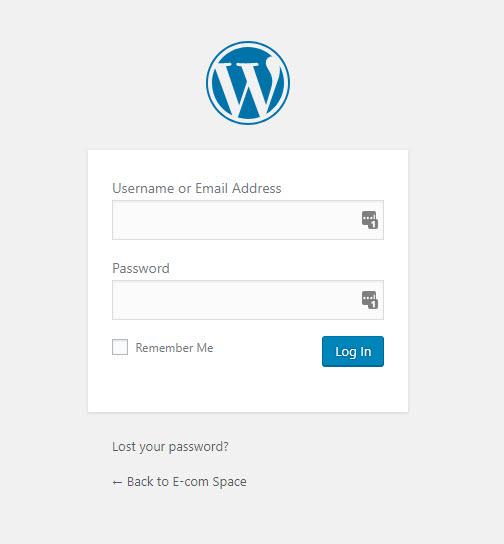
4. Once loaded, your new WordPress login details should appear. Take note of them then login into WordPress.
5. Take a minute to have a mini celebration. You’ve now created your first website!
Now it’s time to design it into something that “fits” your blog.
Step #4: Designing your blog
This is the fun bit. Now you’ve set the foundations to your first website, it’s time to turn this into your blog. This part of the post will show you how to change the look of your site.
It still shocks me how many remarkable FREE themes WordPress offers that you’d have to pay for on other blogging platforms.
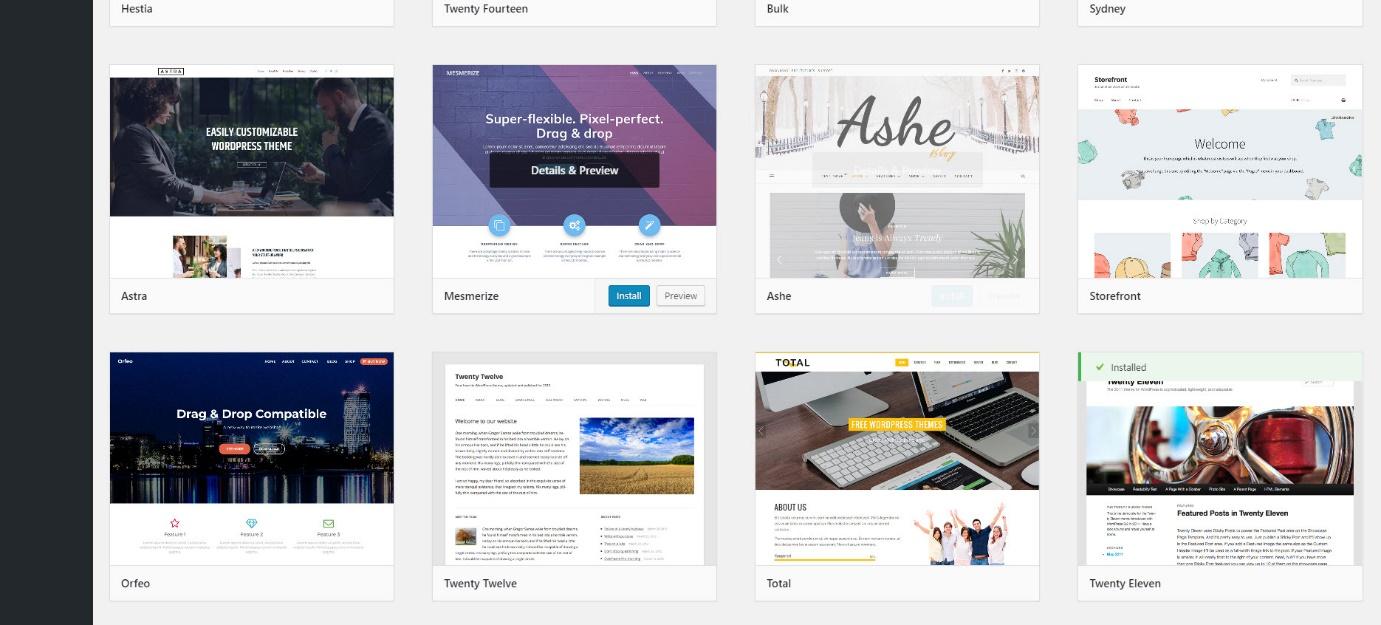
Overall, WordPress has 2,000+ designed themes to choose from. So if you don’t get your theme right the first time, don’t worry. You have thousands more to pick.
Here’s how to change your theme:
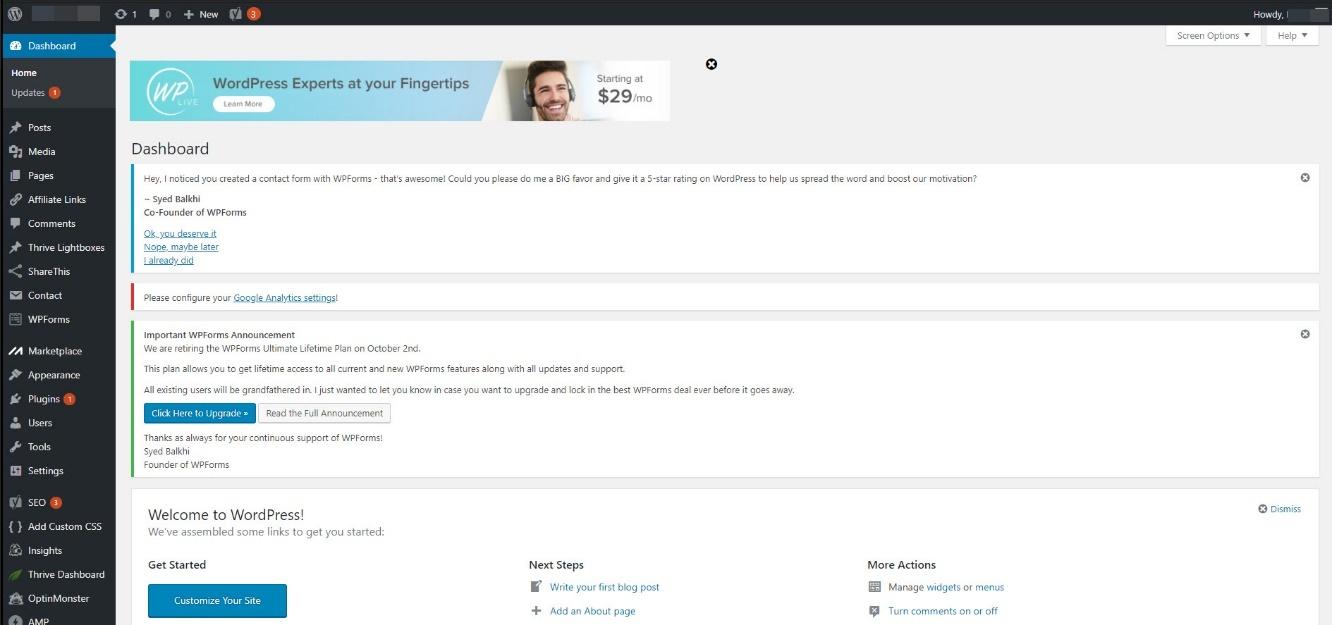
When you log into WordPress, you should see a dashboard in front of you:
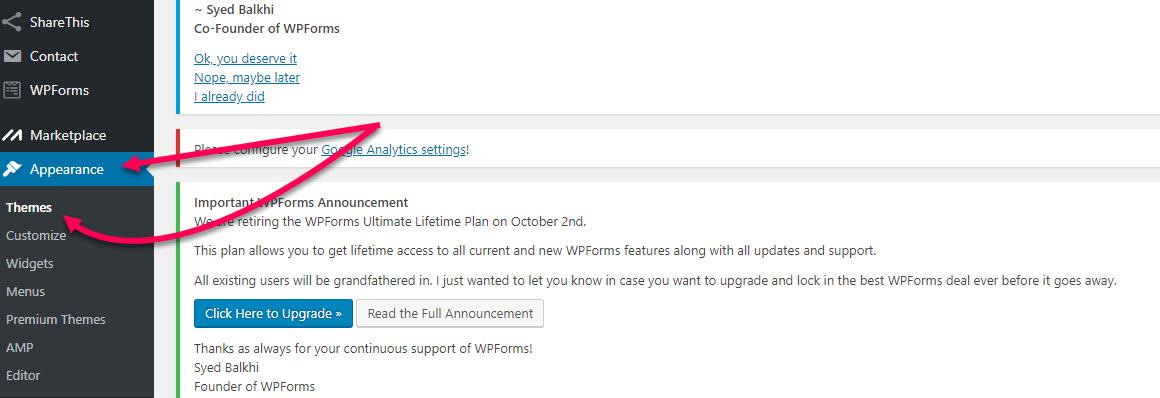
Click the “Appearance” tab on the sidebar, then select “Themes”.
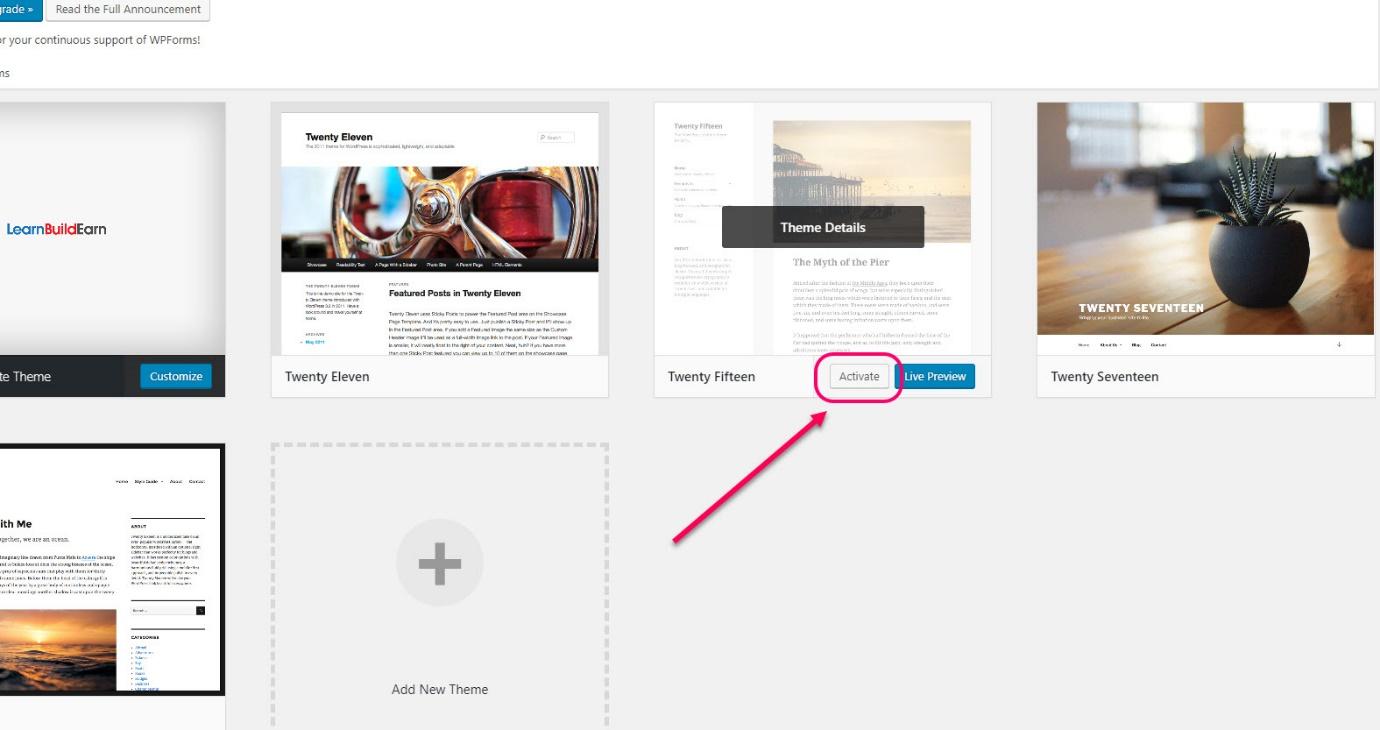
On the “Themes” page, you’ll see a placeholder that says “Add New Theme”. Click on this and you’ll be directed to a page of several themes to choose from.

NOTE: I know a lot of people get overly obsessed with the design of their blog – instead of actually starting one. My advice: Choose one that catches your eye first time. Don’t waste too much time over choosing what theme to use for your blog, because you can always change it later on.
When you’ve found a theme, click “Install” then “Activate” it so it appears as your original theme.
How to write your first post
Obviously the most important step to a great blog is to write something.
In this part of the post I’ll show you how to write your first post for your blog.
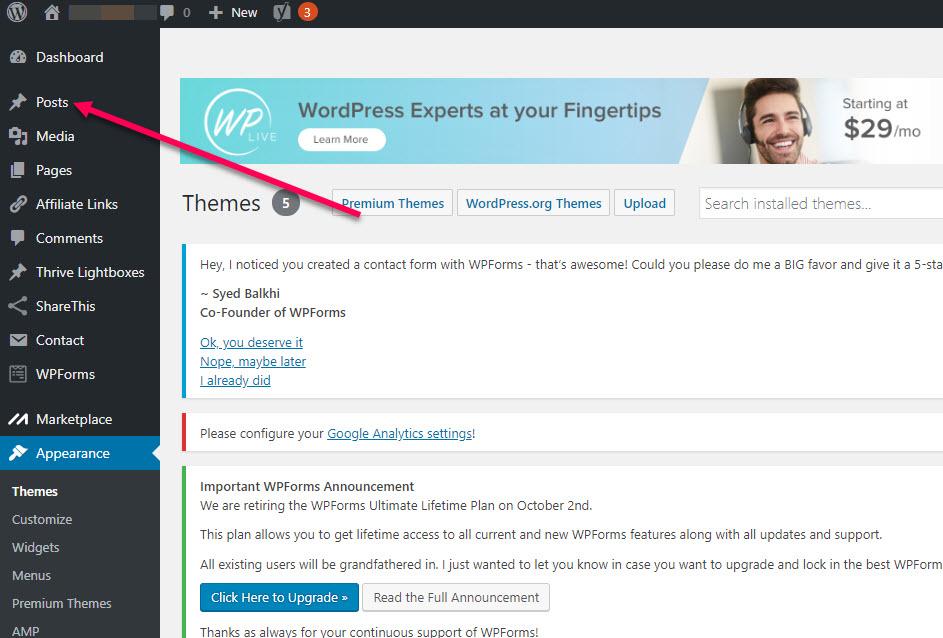
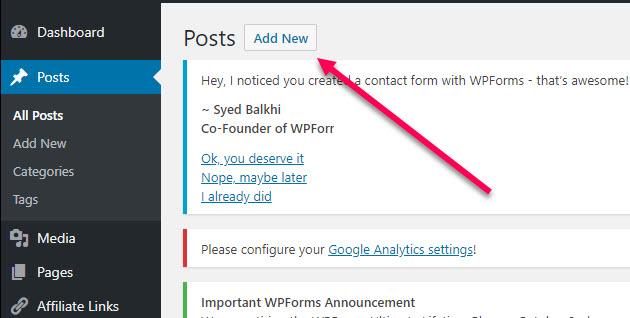
To add a new post, click the “Posts” tab on your sidebar:
Then on the page you landed on, click “Add New” at the top.
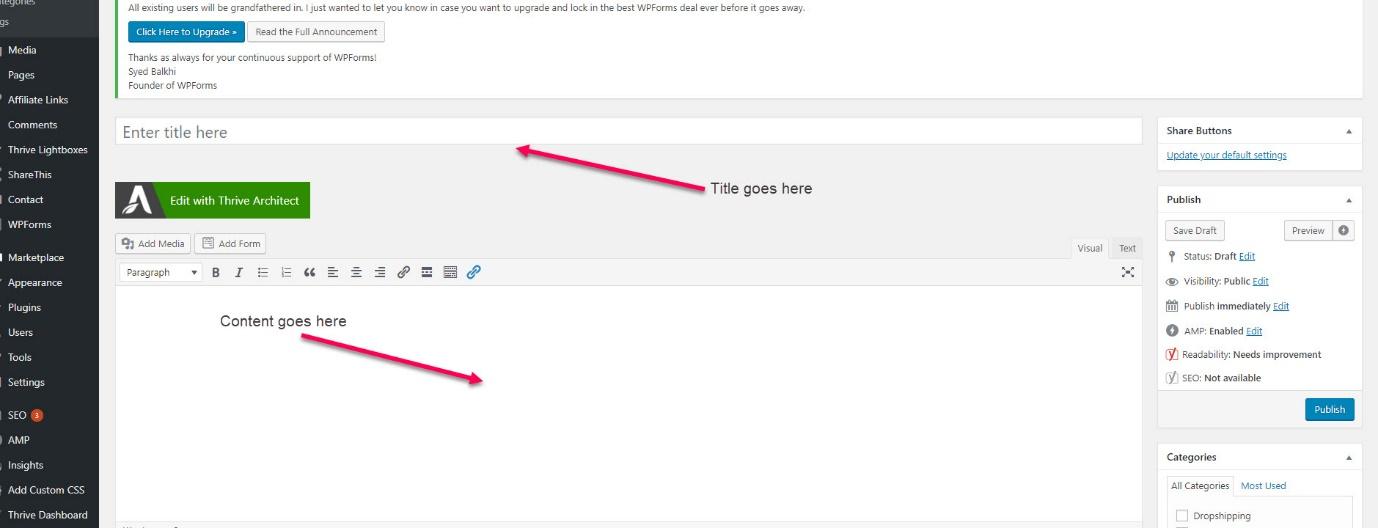
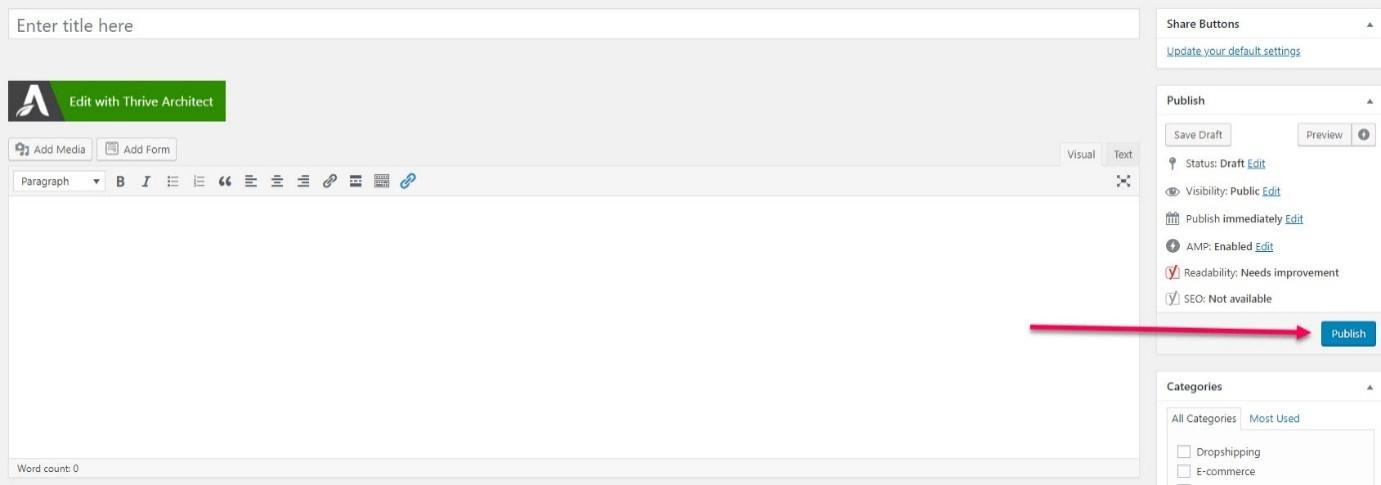
The title of your post goes in the top field, and your content follows in the bigger field.
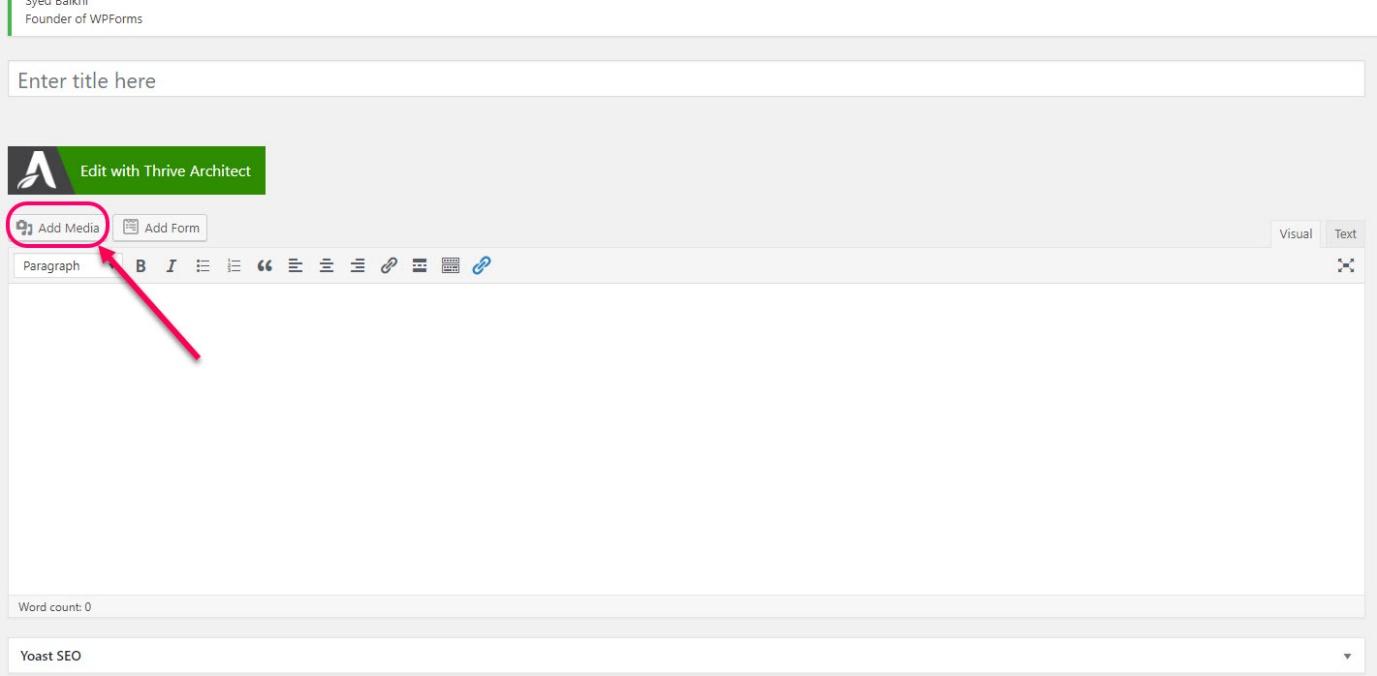
To add images to your post, simply click the “Add Media” icon above the content field to upload an image.
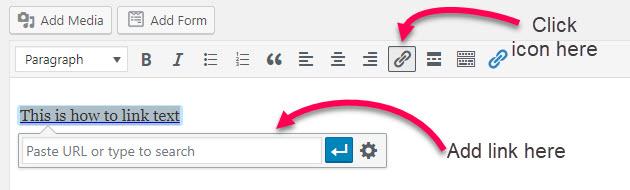
If you want to add links to your post, selected the words you want to link, then click on this small icon on the head bar.
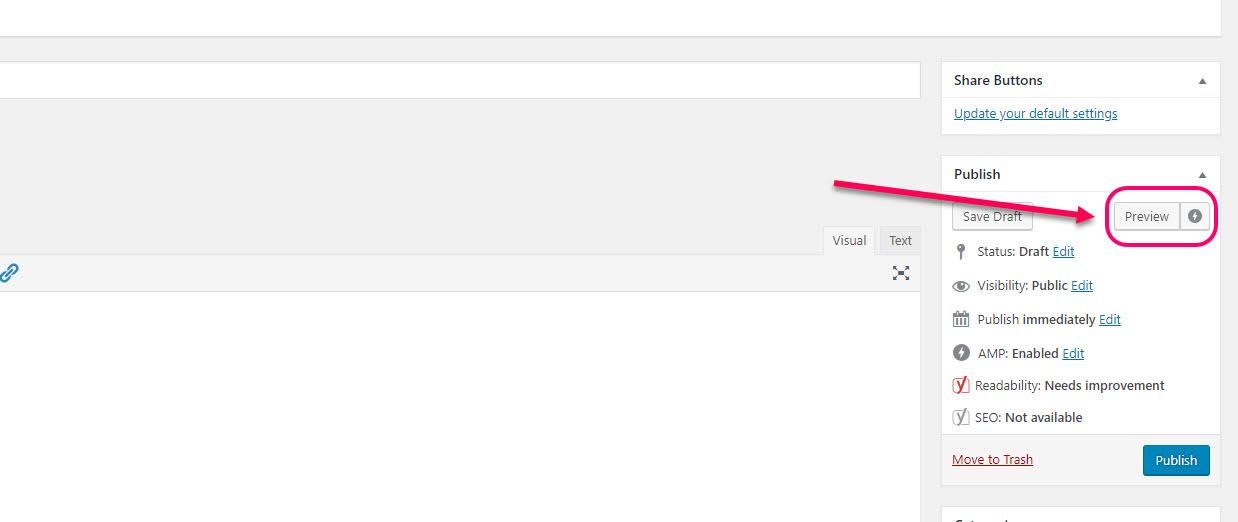
You can always see how your post appears in live form by clicking “Preview” in the far-right hand corner.
Once you’ve written your first blog, you can choose to save it as a draft or post it publicly. If you want to post it public, hit “Publish” on the right of your screen (see below).
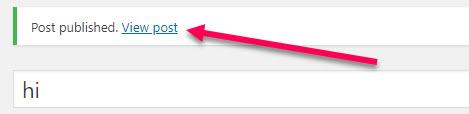
To see a preview of how it looks on your site, click “View Post”. It should be in underlined in blue just above the top field.
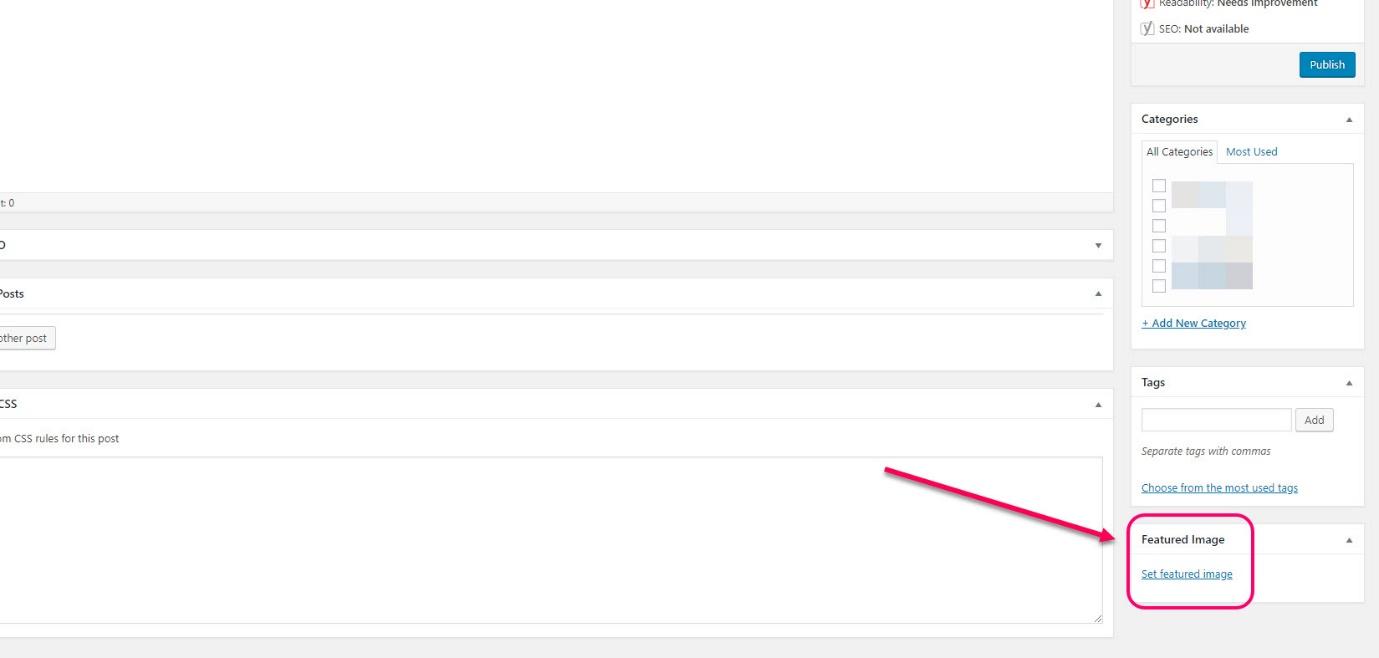
To add a display image, click “Set Featured Image” at the bottom right of the page – you can then upload an image from your media library or computer.
And BOOM – there’s your first post.
Here’s a couple more things you might want to get done when your first start a blog.
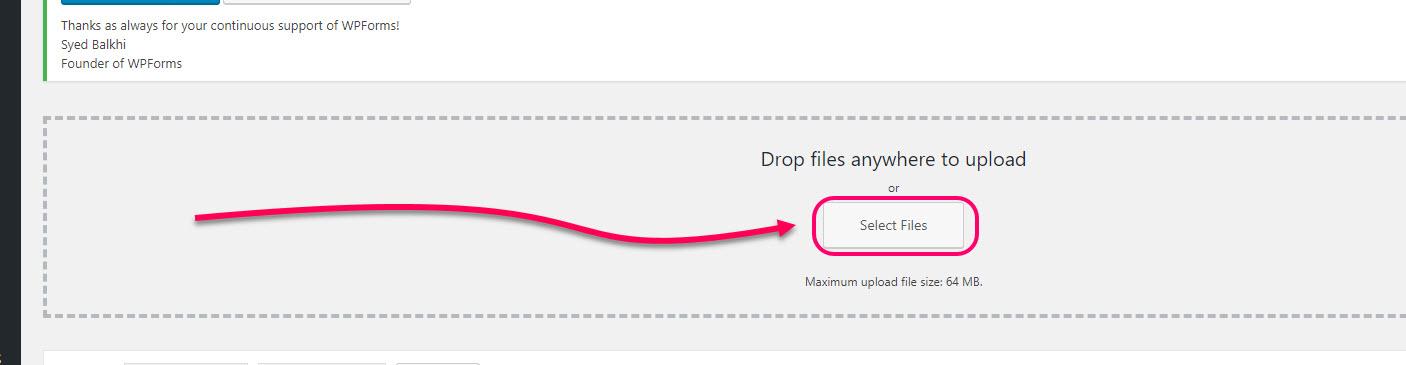
Insert Media
Click “Media” on the left-hand side of your dashboard, then “Add New”.

Then to upload a file, click “Select File” in the box that appears.
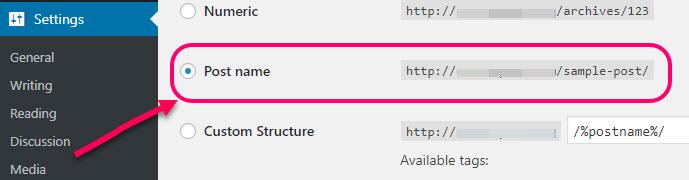
Remove ugly URLs
Having URLs that are way too long and messy, can’t set you up for bad rankings with search engines.
Ugly URL: htttp://www.affilorama.com/2018/07/how-to-start-a-blog-4-easy-steps
So it’s important to keep these as short as possible but clear at the same time.
To do this, go to “Settings” >> “Permalinks”. Then set to “Post Name” as shown below.
Now you’re off the ground, it’s time to get the ball rolling with your blog.
Like I said at the start, you can make anything out of your blog. But nothing beats sharing your passion and helping others whilst making an income doing it.
At Affilorama, we can show you exactly how to do this using the power of Affiliate Marketing. We’ll show you how to go from “blank blog” to “niche expert” site – and make a BIG income doing it.
Become a member of Affiliorama (it’s free), and we’ll take care of everything you need to get started. With 120+ FREE video lessons on Affiliate Marketing and several more resources to guide you block by block on your Affiliate journey – it’s no accident that Affilorama is the biggest affiliate community on the internet.
To get started now, click here to create an account.
Read more: affilorama.com


