[ad_1]
If you are looking to use video in TalentLMS, these 10 steps will teach you how to incorporate it into your customer training on the LMS. And by the end of this article, you’ll be able to create clear and helpful videos highlighting your product’s use cases and value propositions.
Think about the last time you had a problem with a product. Maybe it was a TV you couldn’t set up or a computer issue that kept occurring. How frustrated did you feel not knowing what to do or how to fix it?
You don’t want your customers to feel that same frustration with your product. Teach them how to use your product, so they’re never in this situation.
Customer training allows clients to solve common questions about how your product works in their own time. They can watch and re-watch these videos until they successfully find the solutions.
1. Interview customers
Interview customers to understand the most significant challenges they face while using your product. Then use this knowledge to make a course that teaches them how to overcome these problems.
Interviews also uncover why customers buy your product. You can learn about the experiences clients faced when they decided to look at your solution. Knowing why people buy your product helps you prioritize the courses you need to make. If most clients buy your product for Feature A, build customer training around this use case. Consumers are more likely to stick with you if they can take full advantage of the use cases they value.
Choose different types of clients when you are ready to conduct interviews for your video in TalentLMS. For example, interview both new and existing customers or buyers from diverse backgrounds. Talking to various clients offers an accurate view of how people use your product and the challenges they encounter. You will understand different people’s unique challenges, allowing you to produce videos that solve every user’s concerns.
Ask customers what they would like to see more of and how they use your product. As the interview continues, ask follow-up questions to learn your customers’ opinions.
But no matter what you ask, avoid leading questions. These inquiries prompt a response, leading to biased answers that don’t give an accurate view of what customers think of your product.
2. Write a script
Your script is the roadmap for your video. It tells the actors what to say and explains what’s happening in each scene.
Your script’s language should be relatable, using simple and understandable language. Think about how you talk with friends, family, and customers. Do you use complicated jargon that they don’t understand? Or do you use common words and phrases to get your point across? Using simpler language will make it more accessible to everyone who watches the video and allow everyone to understand the points you’re making.
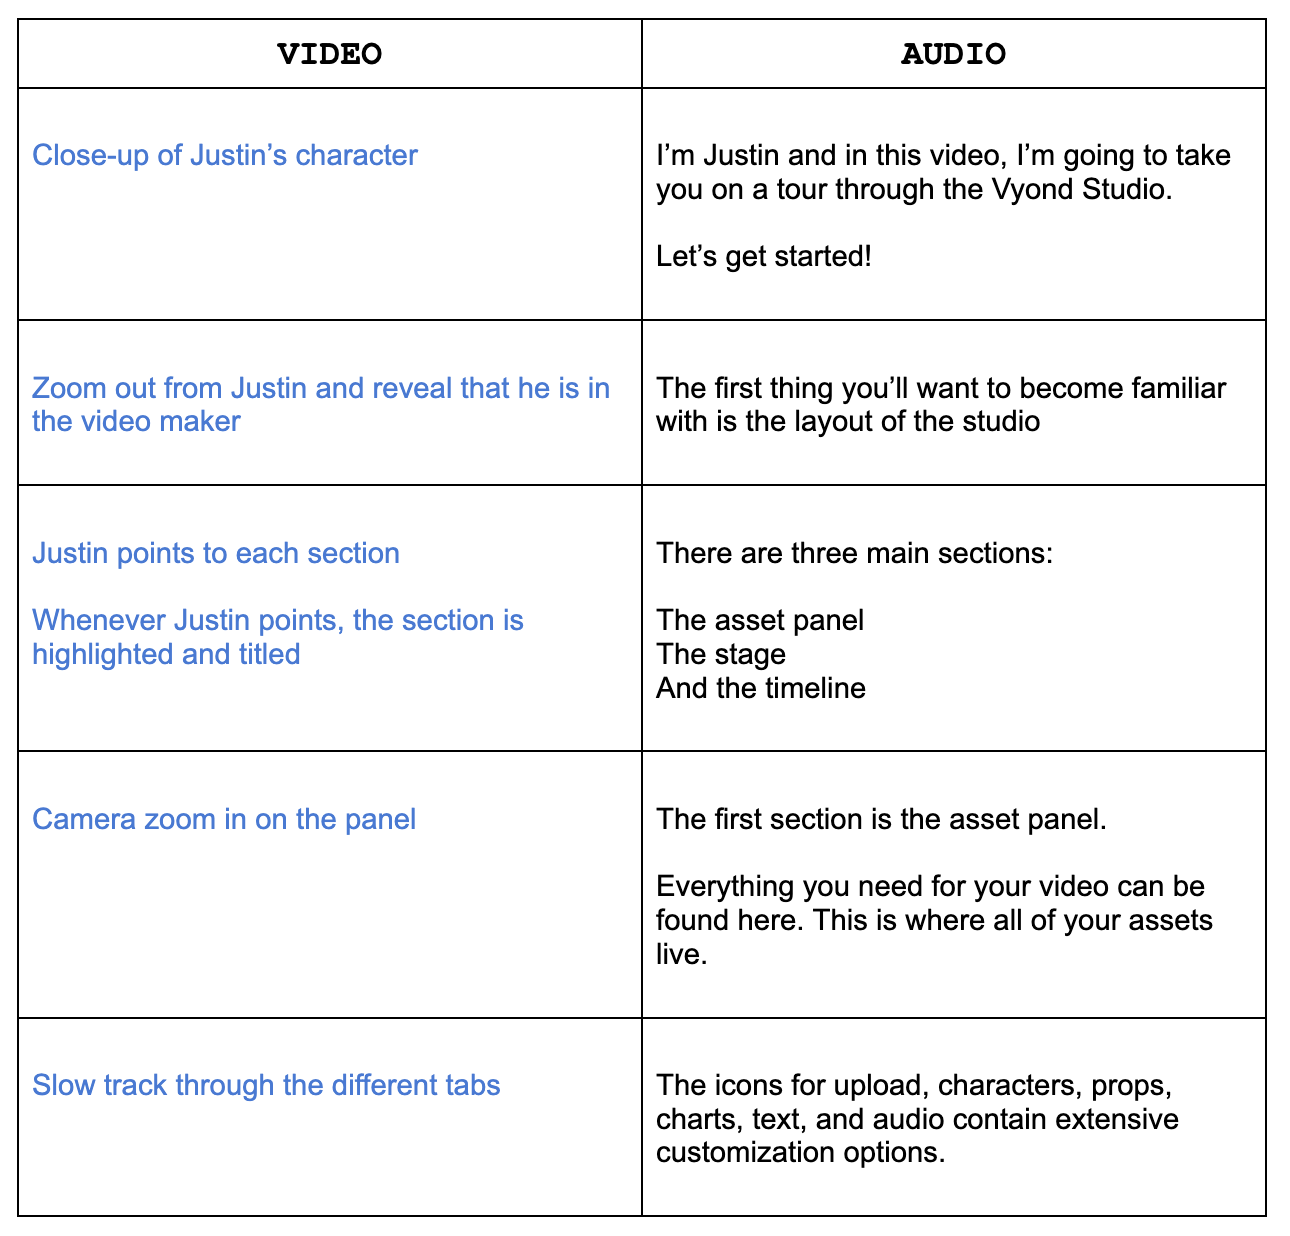 |
Write your script in a two-column format. On one side, describe what will happen in your customer training while the speaker says the lines. For example, note the movements you want a character to do in a scene. On the other side, include the script lines you’re planning for the scene. This layout lets you continuously check if how you plan to visualize the script events makes sense.
Let your script sit for a day or two. Taking a break from your work and then coming back with fresh eyes helps you find boring, redundant, or confusing sections in your script.
3. Create a storyboard
A storyboard is where you sketch the rough idea of the scenes you’re planning for your video. Think of it as a draft of what will visually happen in your video, just like an outline is a draft of your script.
The storyboard lets you plan out your video before you start animating. You’ll see each scene, allowing you to pick out any scenes that seemed better in your head than in reality. Besides, you won’t have to guess what to do during the animation stage.
Creating a visual draft also lets you decide if you have the resources needed for your script. Sometimes, an idea might be too ambitious for the scope or budget of the project. Having a full view of your customer training saves you from starting a project you don’t know how to finish.
To begin your storyboard, download our free template in a US Letter or A4 format.
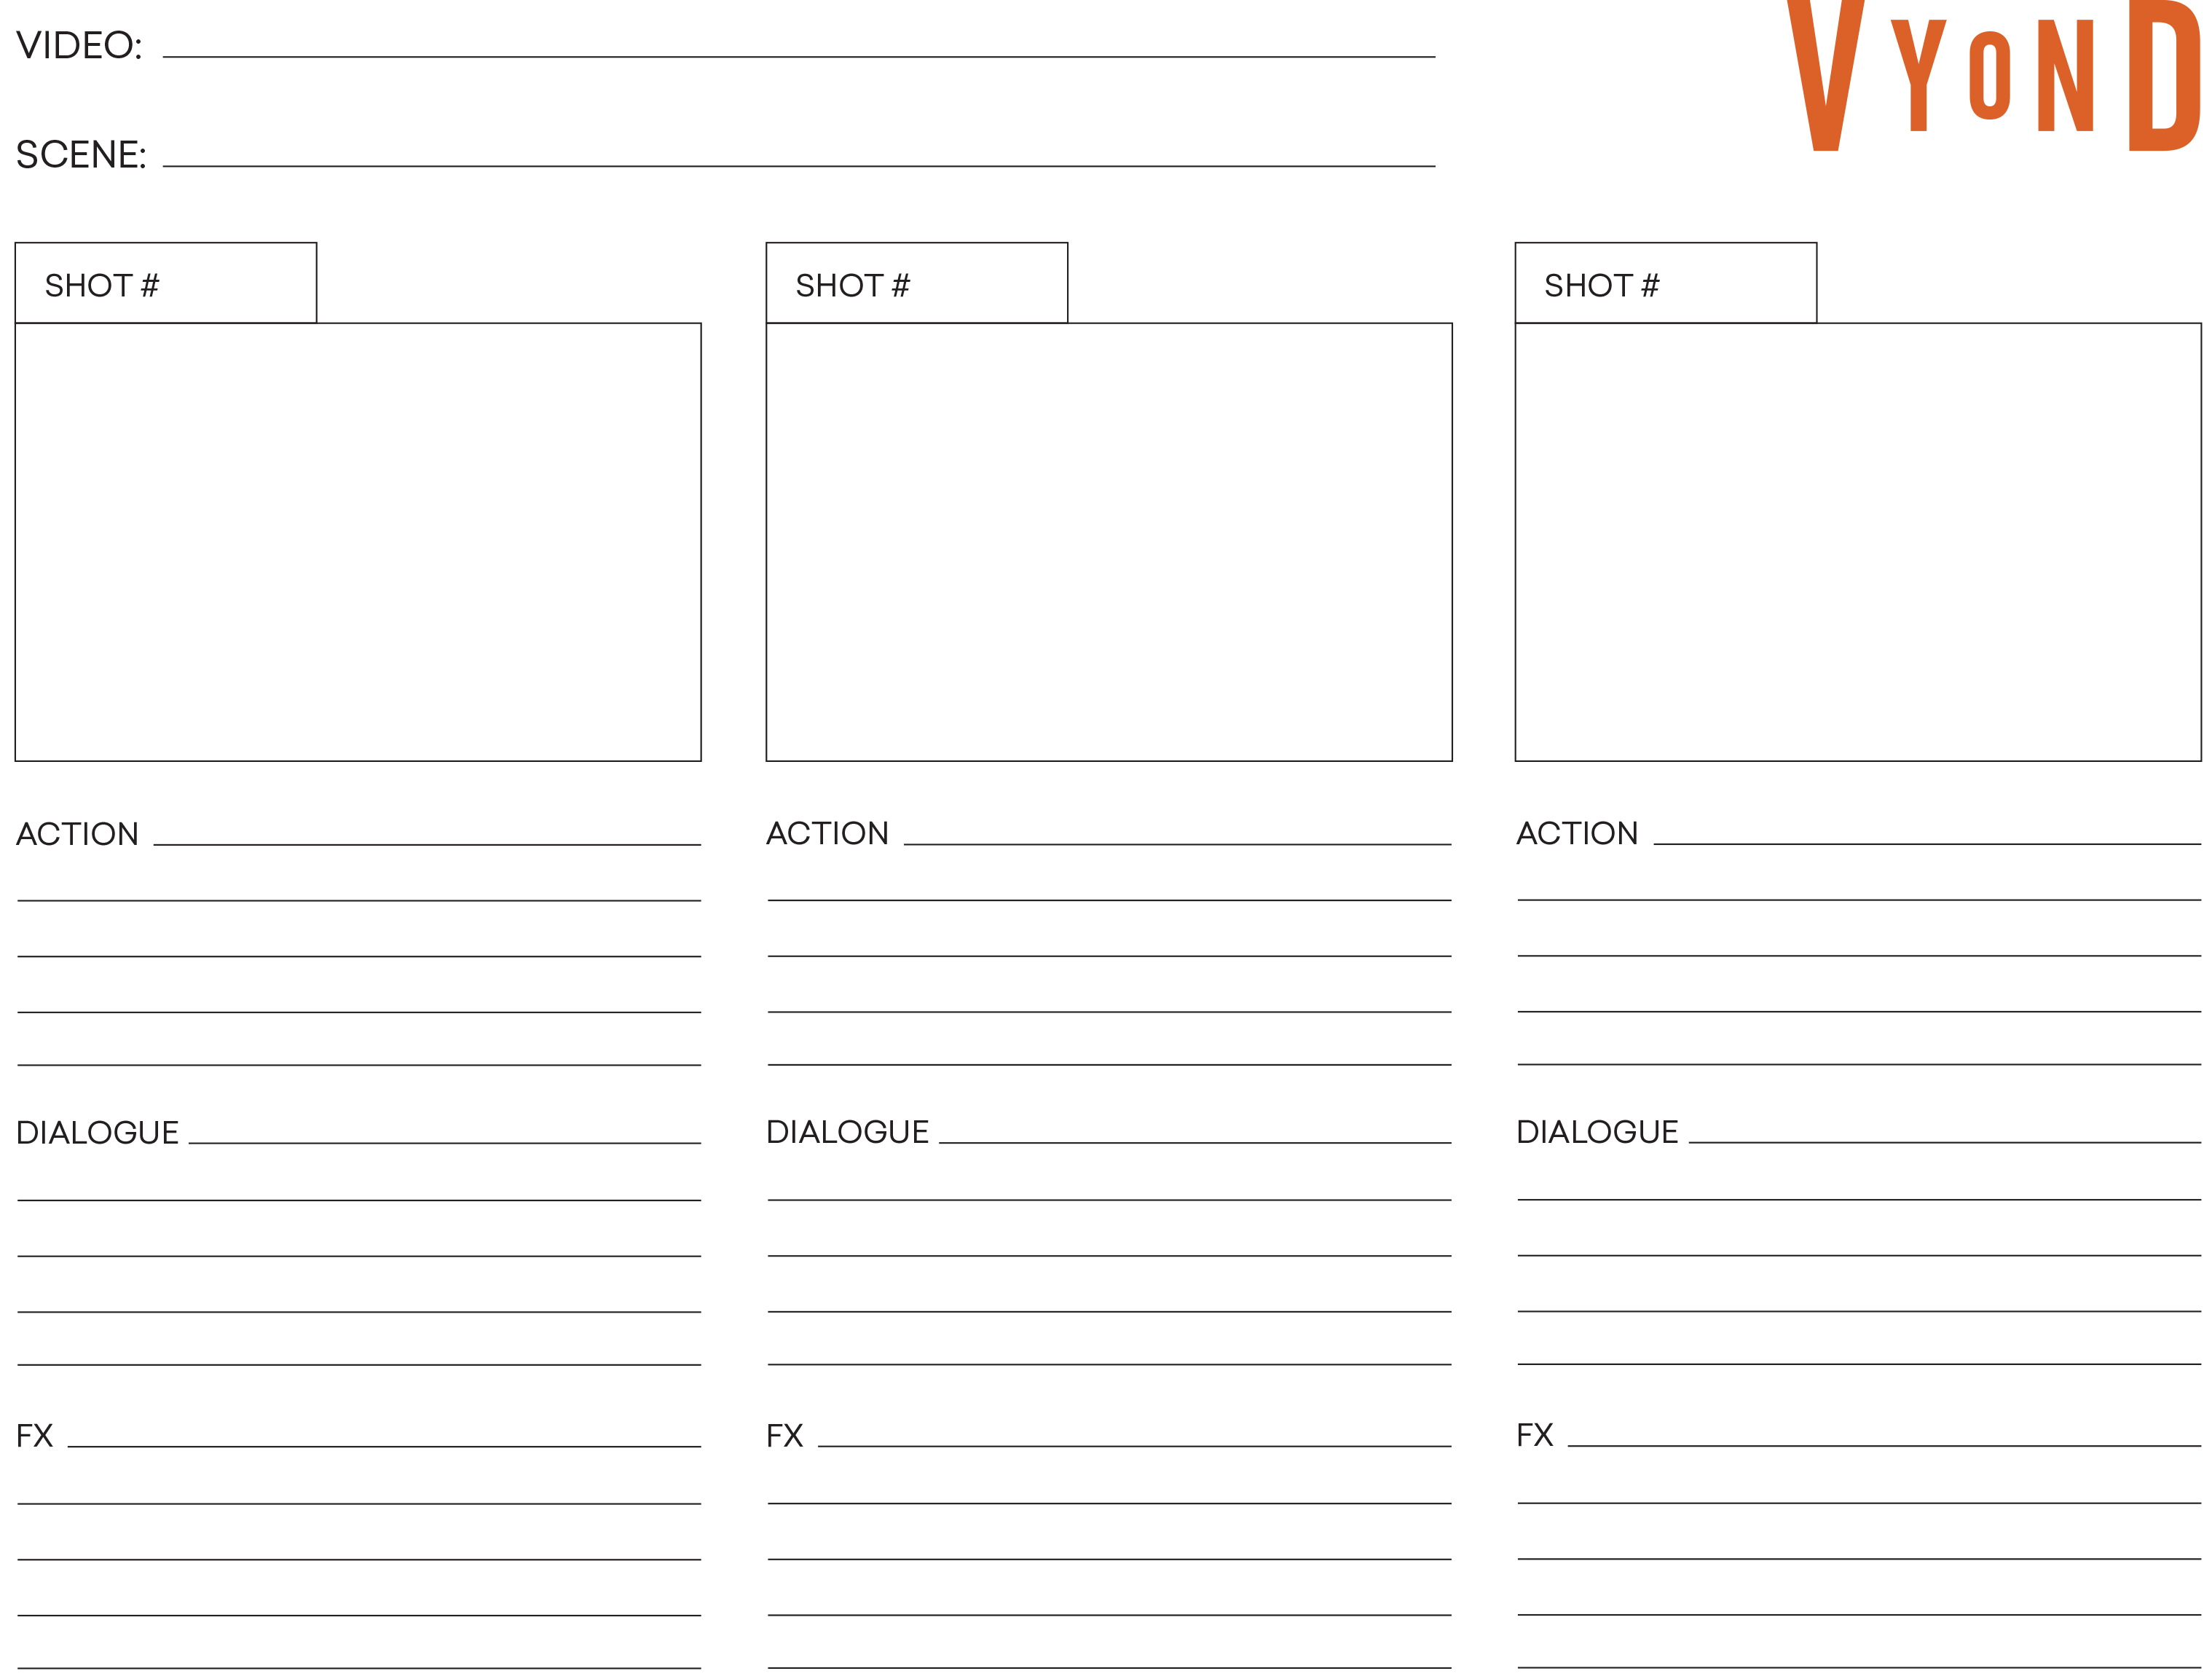 |
Start by sketching your scenes inside the squares. Let’s say you are recording a live demo of a tool. In that case, draw where your face and computer screen will be. Will your face be displayed within a circle at the bottom of the frame? Or will you go for a side-by-side frame? Sketch your answer, so you know your video’s layout.
Once you sketch every scene, describe the actual events that will occur, such as the speaker launching an app or a chart appearing on screen, using the Action section. These should be based on the left-hand column of your script. Then add your script to the Dialogue lines.
As the last step, mention the sound effects you think would lead to an engaging listening experience in the FX section. Ask others if they agree and plan to source these sounds.
4. Animate your scenes
Animation helps you explain topics that are challenging to convey through live footage. Since animations let you depict anything you want, you can simplify abstract topics. A live video training would force you to explain everything using words and your body language, which not everyone can do.
Log into your Vyond account and create a new video project. Then pick one of three animation styles: Contemporary, Whiteboard Animation, and Business Friendly.
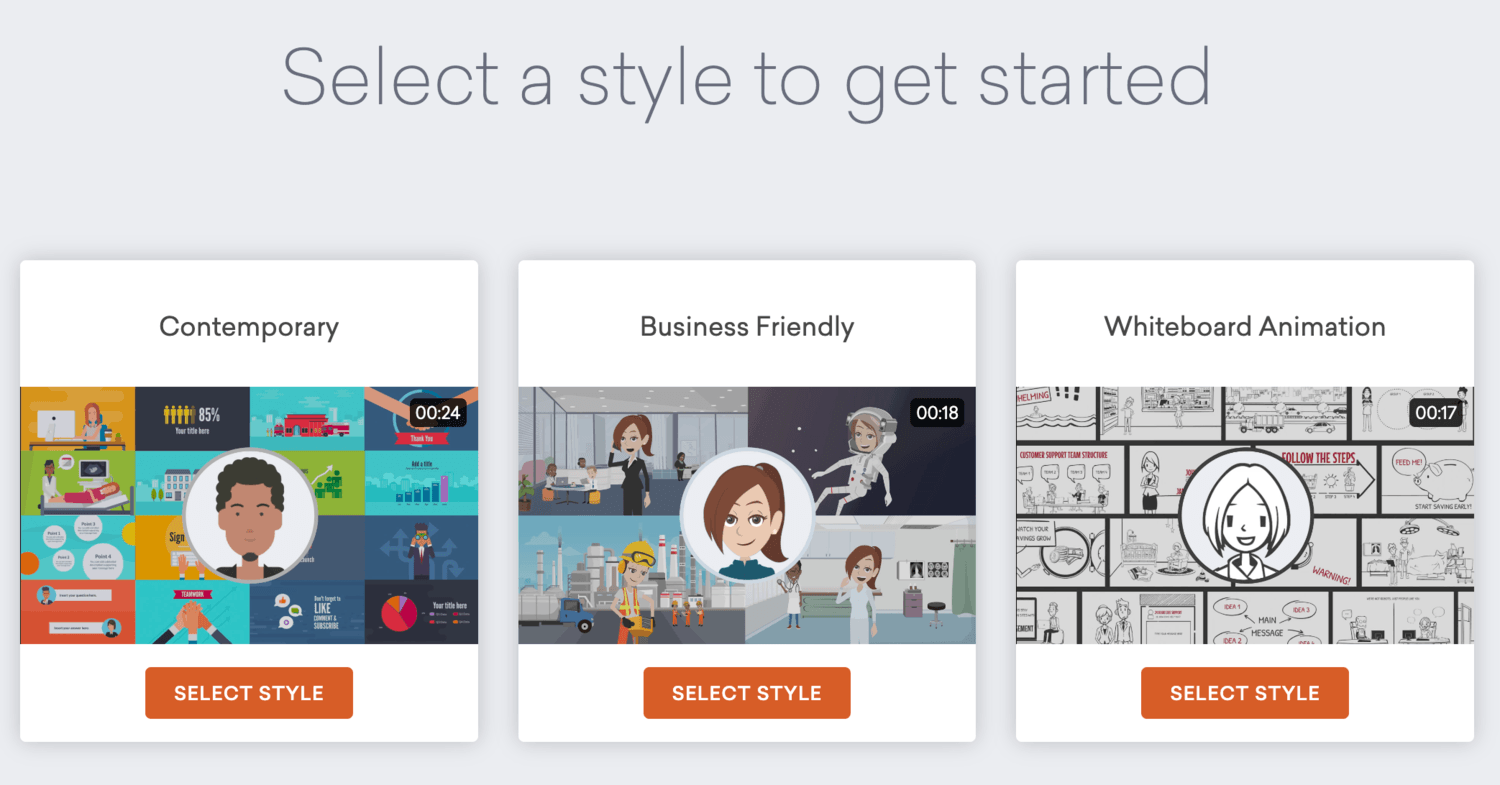 |
These styles won’t influence the tools you can use. But it’s advisable to choose something that matches your brand’s voice and style.
Now it’s time to create your characters. Start by going into the character tab on the left side of the interface, then launch the creation mode. This allows you to pick the character’s body type, features, and clothing. Base your character’s appearance on your intended audience to keep your customer training relatable.
Find props to decorate your scenes in Vyond’s media library—between three and four are a good number as you don’t want a convoluted scene. These props give the customer a sense of where your story’s events occur.
Now that everything is in place, animate your props, characters, and charts. Select them to reveal the Motion Paths tab on the interface’s right side. A Motion Path changes the position of a visual asset: they move from A to B in a pattern. Pick the motion path you like and how long it will take for the graphic to move. Your element will now move across the frame when you play your video.
5. Record high-quality audio
Your audio quality influences what your customers think of your video. If it’s terrible, they subconsciously assume the video is equally deficient. It is crucial to produce high-quality audio, so viewers don’t close your video just a few seconds after launching it.
You don’t need a professional microphone to record clear audio; just get the best one at hand. Headphones plugged into your phone are enough to produce crisp audio while recording in a controlled setting.
But what makes for a controlled setting? The lack of echo and distortions. You can determine if a room will produce these audio effects based on the amount of furniture, windows, and square footage. A large, empty room with windows will have an echo. But if the room has furniture and no windows, the audio will come out perfectly—your voice won’t bounce off the glass, and the furniture will absorb some of the sounds.
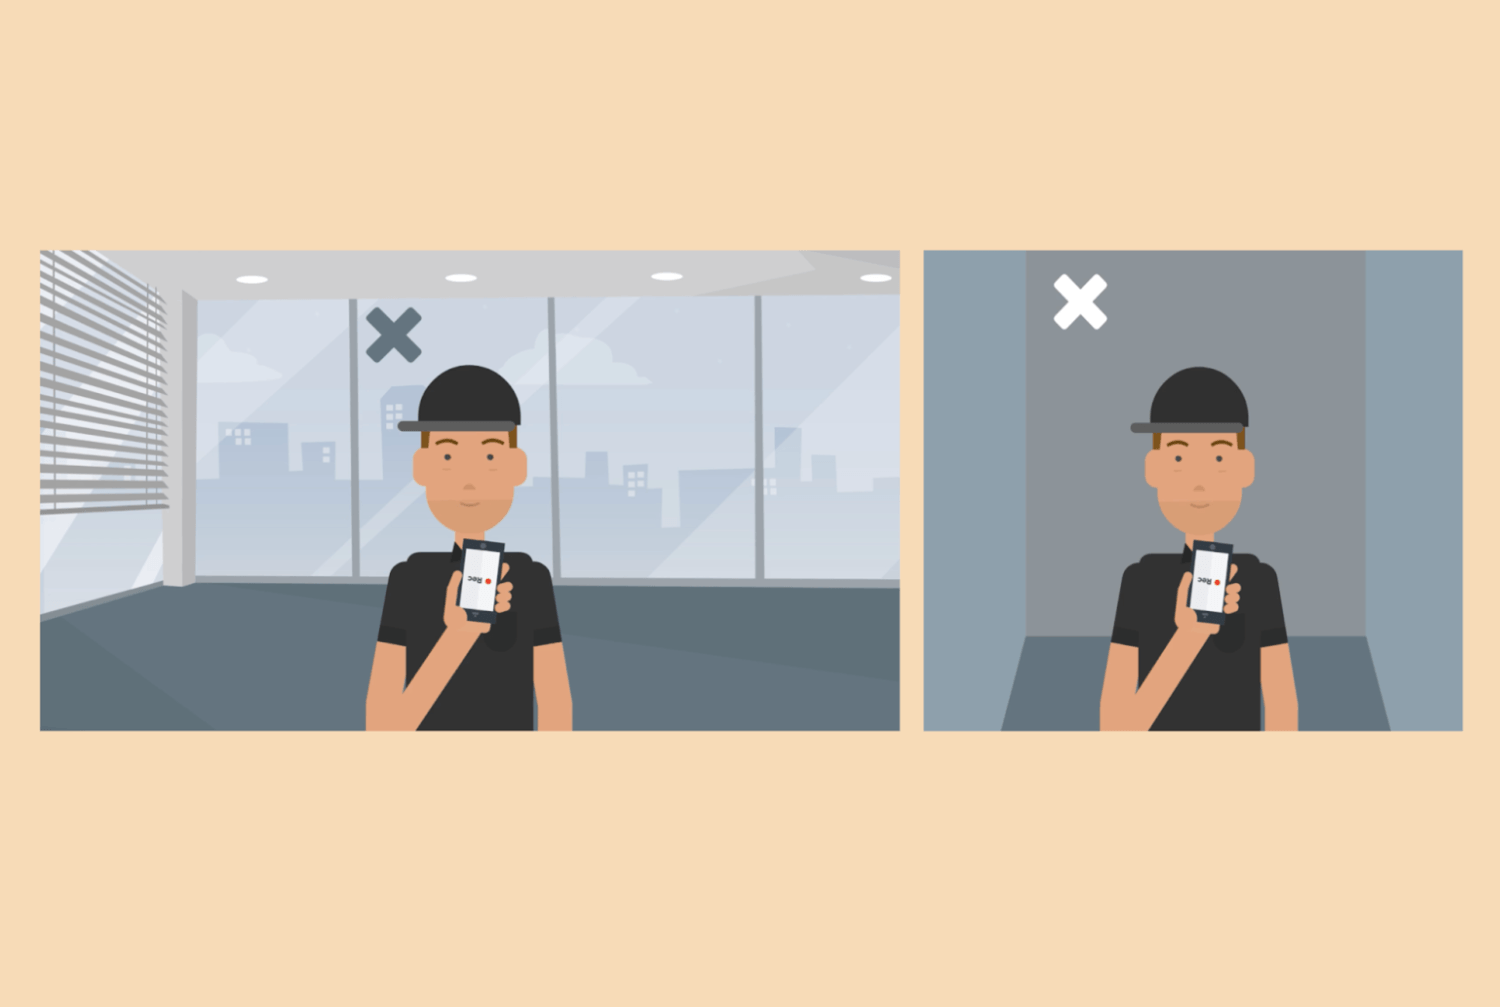 |
When you’re ready to record, position your recording device between your chin and sternum. Here, your voice sounds clear, and microphones are less likely to capture loud notes in this position. Get in the proper place, and press the Record button on your favorite recording app: Audacity is free and straightforward, while Adobe Audition is for professionals.
Export your audio file and take it to Vyond. Then add the voiceover to the entire track or a specific character. Finish by exporting the video using the download button in the top right corner of Vyond Studio.
6. Incorporate your video in TalentLMS
Adding video in TalentLMS is quite simple. The LMS allows you to drag and drop videos, presentations, and other assets to your course. You can upload and launch your course with just a few simple steps.
First, log into TalentLMS and click on “Jump right in and create a course” in the top left quadrant. You will see a square with the words “Add content to your course” on it. Look for your video file on your computer and drag and drop it into the square.
Alternatively, click the Add button on top of the square and then on Video. Name your video based on its content and choose what viewers must do to move on to one video to the other:
- With a question: Customers must answer a question before moving on to the next course item.
- With a checkbox: Customers will click a checkbox to go to the next lesson.
- After a period of time: Customers must wait a specific amount of time to move on to the next section.
Click save.
7. Design an accurate thumbnail
A good thumbnail persuades people to click it and accurately teases the video’s content. It does this by clearly explaining the benefit of watching the video.
The thumbnail should be simple, not overladen with so many images that the viewer can’t tell one from the other. You want the main point to be precise. If you’re creating a course on painting a bright pink elephant, you could have “Paint an Elephant!” in bright pink lettering across most of the thumbnails. Then add relevant graphics, such as a paintbrush or a pink elephant. You want the viewer to know what the video is about at a glance.
High-performing thumbnails also use contrasting colors. These color combinations help the essential elements of your thumbnail stand out. Ignore contrast and customers might not even see the value proposition you added to your thumbnail.
You can create a thumbnail that teases the video’s topic or references a pain point it solves using Canva. The tool is intuitive and offers thousands of free images and graphics.
First, click the “Create a Design” button in the top right corner and open a new design project. Use 1280×720 as this custom size works on all streaming platforms. Canva will automatically detect you’re making a video thumbnail and suggest templates to help you do so faster.
Second, choose a layout with contrasting colors. If you don’t know how to detect them, use a color palette generator to find colors with contrasting hues, shades, and values for your thumbnail.
Finally, add an image that matches your video’s topic and text that tells customers why they should take your training. A practical way to discover what to include is to ask yourself, “What problem will customers solve with my training?” Your answer is what you should add to the thumbnail.
8. Gamify your TalentLMS videos and courses to hook customers
You can add elements from game design to your training to make learning more fun. Gamification works because it rewards the learner for doing something well. For example, when customers gain a bronze badge for completing a course module, they are motivated to complete the entire course to gain the gold badge. Keeping the bronze badge would mean not progressing.
Gamifying your video in TalentLMS is also possible. The LMS allows you to add points, badges, levels, leaderboards, and rewards to your courses. You can configure these features from the Gamification tab under the Account & Settings menu:
- Set the number of points required to level up as a course-taker.
- Choose the number of points customers receive for logging into your platform, completing a course, or passing a test.
- Establish the steps needed to earn a badge of a certain level. For example, give customers a level one assignment badge when they pass three assignments and a level two when they pass 10.
- Specify how TalentLMS will rank your customers on a leaderboard, such as by level, points, or badges.
Once you’ve gone through each setting, press save and move on to the next step.
9. Test your viewers’ understanding
Add quizzes to your training to help customers remember your lesson. Jeffrey D. Karpicke, a professor of Psychological Sciences at Purdue University, found that taking a test helps the test-taker remember the information longer, even if you don’t give feedback about how they did.
When planning your questions, favor short answers over multiple-choice ones. According to the Purdue study, people are less likely to remember the answer to a question by looking at a short open-ended question than a multiple-choice one. This is because multiple-choice questions present at least one correct answer. Looking at the right answer—before knowing it’s correct—helps customers remember information.
Questions using a short answer format offer no hints. As a result, customers’ brains have to work harder to retrieve data. The study believes the greater difficulty in remembering information makes short answers better at producing learning.
TalentLMS lets you use multiple types of questions, like multiple choice, fill in the gap, and free text. Set your questions, their order, and their importance from the Content and TalentLMS menu.
The importance or weight of a question refers to its impact on your customer’s test score. Set it to zero, and it won’t matter whether your customer answers the question correctly. But set it to two, and the question will be twice as significant as the average question.
10. Analyze what could improve
It’s crucial to track your video’s performance to determine if your training is helpful. Use this data to improve current videos and pitch original ideas to stakeholders.
If your goal is to teach a use case, and metrics tell you 90% of customers are passing every test, you will know the training is valuable. Completing your goal makes stakeholders more likely to approve future training. The data proves your training works and raises their confidence in your ability to create a new successful course.
TalentLMS’s report tab contains your video course’s metrics, such as the number of users, progress percentage, and completed tests. You can compare your training goal with the video metrics to see if the video is helpful: high metrics are good feedback, while low ones show there are things you can improve.
Let’s say TalentLMS’s report tab shows that customers finish 30% of your course on average. The investment isn’t as valuable as it could be. But you can use the data to experiment with solutions. For example, you could give more rewards to those who complete the course or reduce the number of assignments in the program’s first half. See how numbers change and keep tweaking your gamification options until you reach 100% completion.
Use Vyond video in TalentLMS to make customer training
You can use Vyond to create videos for your TalentLMS customer training. Our animation software is intuitive, allowing anyone to explain solutions to problems clients often solve or to describe ways of maximizing the ROI of investing in their tool.
These videos will allow you to retain customers longer. They will spread the word about your expertise, leading to new clients and fans.
[ad_2]
Source link


